Showing posts with label Adobe. Show all posts

Monday, May 25, 2015

8 Free Stipple Shading Brushes for Adobe Illustrator

I’ve been admiring some beautiful illustrations and examining the techniques the artists use to add details to their work. One popular shading method I’ve noticed is particularly prominent in apparel design and illustrations with a retro vibe is the use of stippling, where fine vector textures are added to build up tones and shade in areas of darkness. After seeing how effective this technique is, I created my own set of Illustrator scatter brushes to provide myself and my readers the tools required to create this effect. Download this free pack of 8 stipple shading brushes to easily paint grungy details onto your artwork with Illustrator’s brush tool.


8 Free Stipple Shading Illustrator Brushes


These free stipple shading brushes for Adobe Illustrator are perfect for adding grainy details to your illustrations. This popular shading technique gives your artwork a vintage tattoo or retro style comic book effect by building up tones with tiny vector textures. There’s 8 different scatter brushes available, ranging from light grain to heavy stipples with variances in spacing so you can find the best brush for your project.


How to use the Stipple Shading brushes


Illustrator


My favourite technique for using these stipple shading brushes is with a Clipping Mask. Use the Pen tool to trace an area of your illustration on a new layer, then activate the Draw Inside mode from the bottom of the toolbar.


Adding texture with Stipple Shading brushes


Grab the brush tool, then select one of the Stipple Shading brushes from the library. Go ahead and paint over your artwork to build up the tones with lots of tiny vector textures.


Troll illustration with stipple shading


You can increase or decrease the size of the stipples by adjusting the stroke weight, which helps control the density and grain size to suit your project.


Download the Free Stipple Shading Brushes 17mb


The post 8 Free Stipple Shading Brushes for Adobe Illustrator appeared first on Blog.SpoonGraphics.


8 Free Stipple Shading Brushes for Adobe Illustrator

Thursday, April 9, 2015

Adobe Doesn’t Want You to Photoshop Money, Here’s How to Do It Anyway

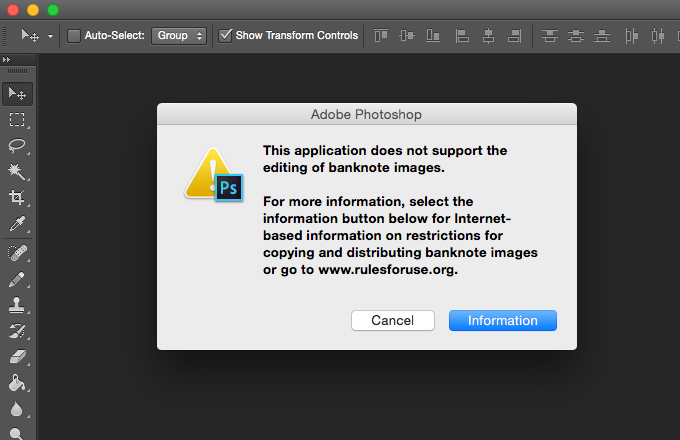
Let’s say you’re working on a design project and you want to work in some legal tender to give it that authentic look. If you do it with some lower denominations, no sweat: scan it up, take a picture or whatever, and edit away. With some denominations and currencies though, it’s not so easy. Photoshop will actually block you from opening the image.


What the what?


Now I get it. Adobe doesn’t want us using their software to counterfeit bills, which makes sense. (It’d create a ton of bad press if all of a sudden people were printing money like crazy all thanks to a Creative Cloud subscription.) But what if you had less nefarious plans? What if you just wanted to make some cool designs either onto the bank notes or using them in a pattern? Well, let’s figure out how to get around the baddies, shall we?


Step 1: Find an Image


After a quick Google search, I found a ton of scanned Canadian currency. A bunch of it has “Specimen” printed on the outside, but we want the legit stuff, so I pulled from the non-labelled models.


I started off with an older bill, and had no problems opening it up. So next, I tried the .


In an interesting twist, I could open up the original jpeg of the bill in Photoshop, no problem. But when I attempted to open up the screenshot to edit it for this post, it gave me the anti-coutnerfeit message. Weird.


I decided to take it to the next level and go with a 0 bill, which gave me the same message. Let’s check out the workaround.


Step 2: Start In Illustrator, Not Photoshop


First, I opened up the jpeg in Adobe Illustrator.


Next, I saved it as an Illustrator file. Then I opened up that file in Photoshop.


And, just like that, tada!


Tip: Don’t have Illustrator? No problem. All you need is an app that will open the image and is capable of saving it as a PDF. Preview for Mac is a good alternative.


Use Responsibly


Now remember, we’re not condoning the counterfeiting of money, because that’s highly illegal. That being said, there are legitimate use cases for using money imagery in design. As an example, just look at the header image for this article. We wanted to show a pile of money, but that photo was one that was blocked by Photoshop by default. Using this simple trick, we were able to get the effect that we wanted. Pretty handy!


Legal disclaimer: In many countries, there are specific laws governing editing of currency related images. Before you go fiddling with money too much in Photoshop, it’s a good idea to do your research to discover what is and isn’t allowed in your area.


Kevin Whipps is a writer and editor based in Phoenix, Arizona. When he’s not working on one of the many projects in his queue, he’s looking for fun and irreverent things online to share with his friends.

Products Seen In This Post:


Share on PinterestShare on Pinterest


getpaidtowrite-banner
Adobe Doesn’t Want You to Photoshop Money, Here’s How to Do It Anyway

Tuesday, April 7, 2015

Adobe Slate Magically Turns You Into a Gifted Story Designer

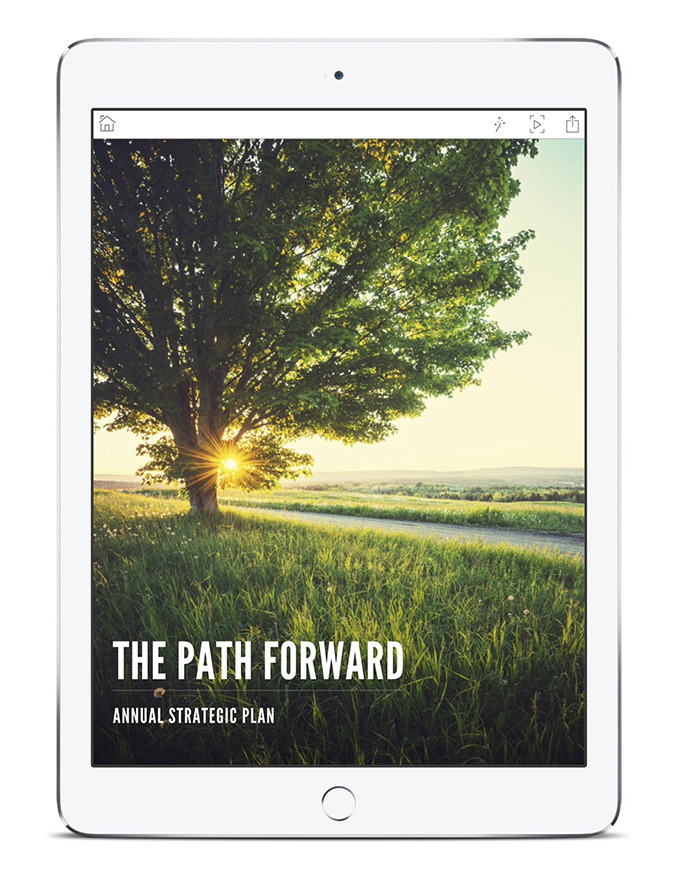
Ever try to have a conversation with your mom about web design? Not everyone gets technology, and if your family falls into that category, the chances of them designing their own webpage is virtually nil. But Adobe is hoping to change that with Adobe Slate — an iPad app designed to give anyone an easy way to create their own stories and deliver them on the web.


adding_text_is_easy_with_the_voice_to_text_feature


slate-3


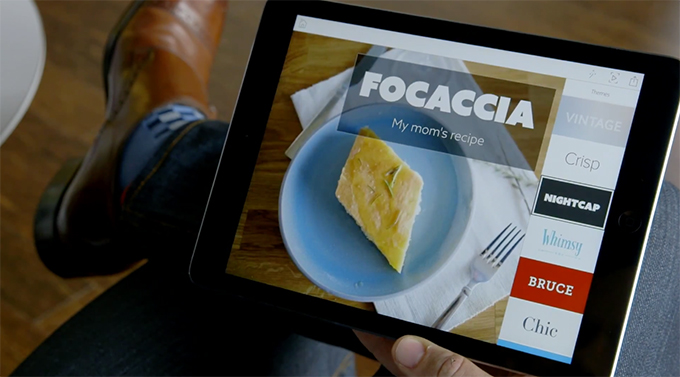
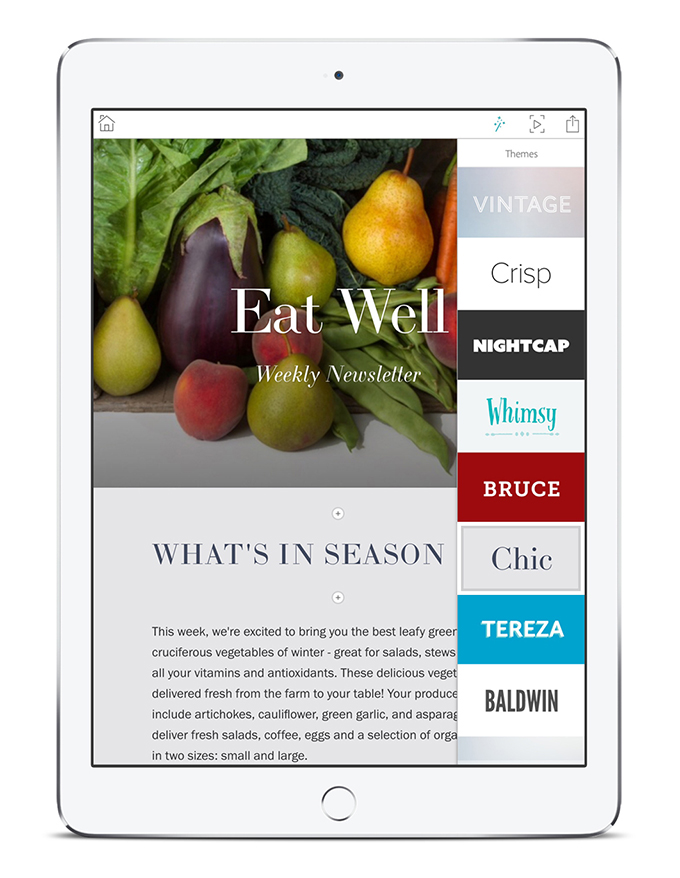
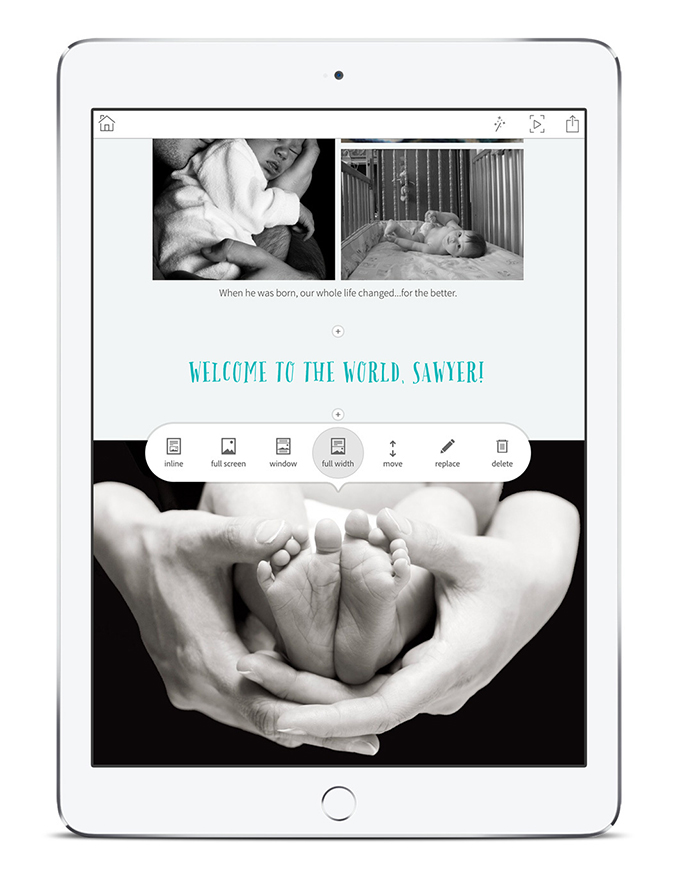
First, the price: free. No, you don’t need a Creative Cloud account, it’s free for everyone (although you can connect your CC account if you like). Second, it’s super easy to use. Like the box says, you just create your own page using their templates and you’re good. Drop in pictures, dump in your text and away you go. Pull quotes and the like float into place as you scroll to them, and images are displayed with a parallax feature. It all looks very cool for something that costs nothing.


create_professionally_designed_magazine-style_layouts


slate-2


Just to prove how easy it is to work with, I took all of five minutes and created a quick Slate (is that what we’re calling them?) with a picture of the kids at Home Depot. Here it is — enjoy!


choose_from_multiple_stunning_professionally_designed_themes


customize_your_slate_with_an_array_of_layout_options


Kevin Whipps is a writer and editor based in Phoenix, Arizona. When he’s not working on one of the many projects in his queue, he’s looking for fun and irreverent things online to share with his friends.
Adobe Slate Magically Turns You Into a Gifted Story Designer

Thursday, March 5, 2015

How to Capture Vectors on Apple iOS with Adobe Shape CC

In the final quarter of 2014, Adobe released a number of new apps on the Apple iOS App Store. One of those was Adobe Shape CC. In this article, we’ll explore the ways in which we can capture and edit high-fidelity vectors from real-life moments using the device camera on either an iPhone or iPad. We’ll also be able to save these captures in our Adobe Creative Cloud for further use in Photoshop, Illustrator, InDesign or the new Illustrator Draw.


Capturing the Light


Before we even open the app, it’s important to be in a well-lit area; this will improve the quality of our capture and save us a lot of time trying to edit rubbish vectors. Clear and concise shapes work best, this means that clouds in the sky won’t look as elegant as say a hand-sketched illustration with a fine liner. In fact, I’d still recommend using a digital SLR camera and image tracing the result in Adobe Illustrator for photo-realistic captures.


When you’re ready, take a snapshot.

adobeshapecc
Step 1: take a snapshot with the device camera


Altering Our Capture


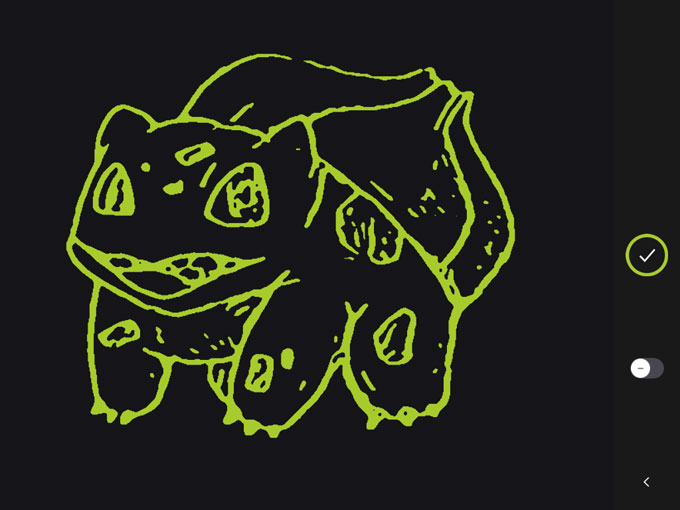
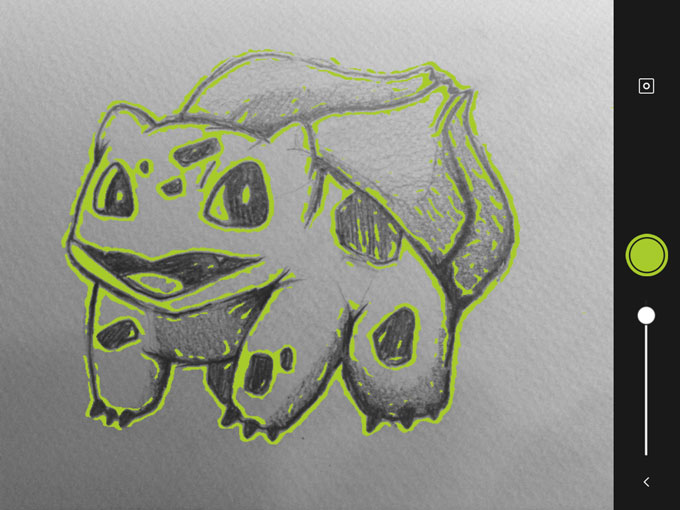
Before Adobe Shape converts our image to vector, we have two options that we can tweak to improve the capture. First, there is an icon that switches between Shape on light background and Shape on dark background. Dark background works more closely with the outline of our hand-drawn capture, whereas light background converts the areas we actually sketched — you can observe the differences in the two resulting images below.
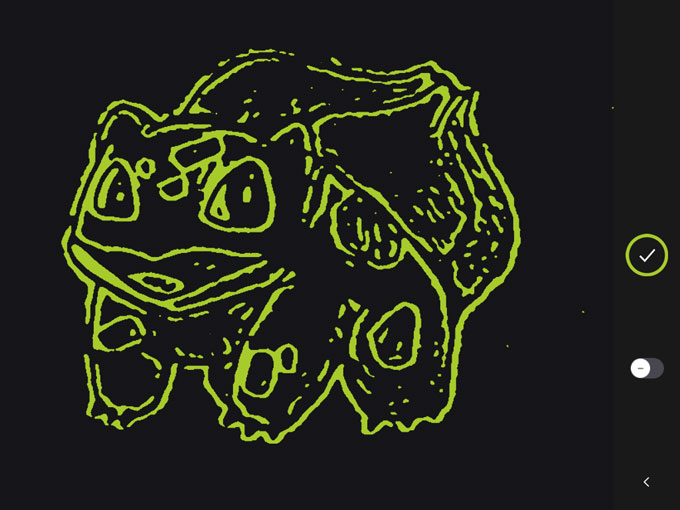

adobeshapecc
Step 2: capture on a dark background


adobeshapecc
Step 3: capture on a light background


In the second option, we have a scrubber that will alter the threshold of the capture. Photoshop has this setting under Image>Adjustments>Threshold, and Illustrator can accomplish this with Image Trace, but Adobe Shape CC will let us alter the threshold directly after the capture.


Don’t be too disappointed by the result at this stage. Remember, the shape hasn’t been refined yet, the real magic is still to come.


Removing Unwanted Elements


When you’re done altering the image threshold, tap the green circle to continue. In this next screen, you’ll be offered the chance to remove any unwanted aspects of the shape before the vector is refined, which you can do by simply selecting the undesired blemish on the canvas.


If there’s only a tiny aspect of the shape that you require, switch the toggle button to “+” — this means “yes, we’ll keep only this part” instead of “yes, we’ll delete this part”. Tap the circle/tick icon when you’re ready to continue.


Refining Our Vector Shape


Now sit back while Adobe Shape refines our vector. It’s actually quite entertaining to watch, and it’s hard to resist the temptation to capture random shapes just so we can watch them being drawn.
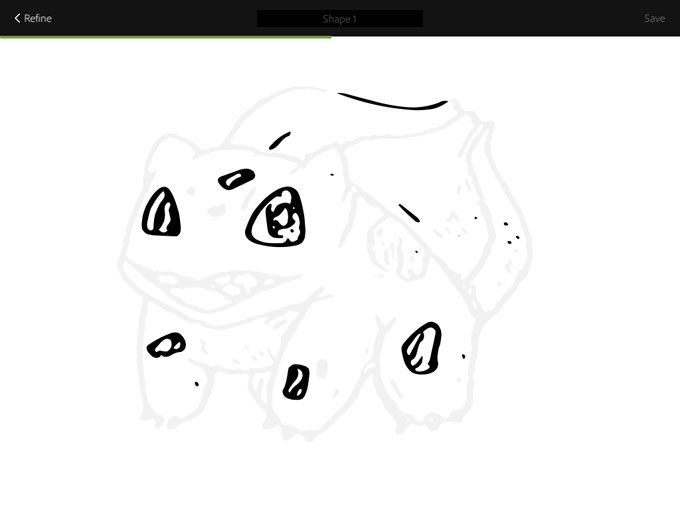

adobeshapecc
Step41: refining our vector shape


When the refinement is complete, you’ll notice a drastic improvement in quality; Adobe Shape will also ask you to name this vector, and when you do so, it’ll be available in your Creative Cloud account under Libraries.


Great, What Now?


You’ll automatically be taken to the library and your first vector should be inside it. Here, you can look at your vector in more detail, create another vector, or invite other Creative Cloud members to collaborate in your library. Now select your vector and lets see what we can do with it.
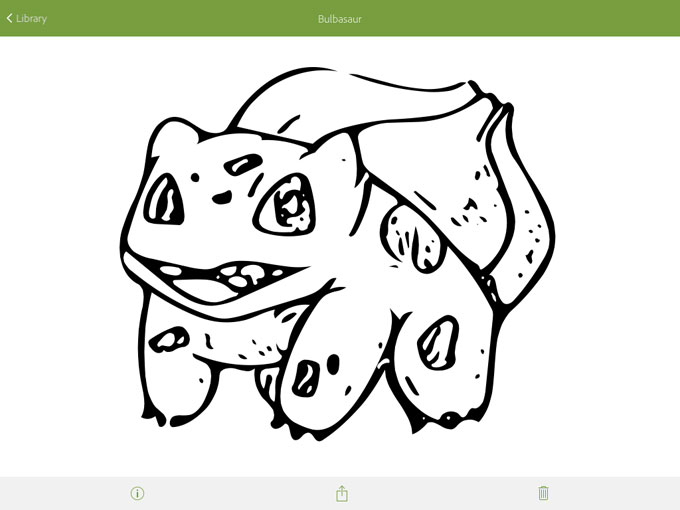

adobeshapecc
Step 5: using our vector in Photoshop


We have three options: Rename, Share and Trash. Although we can share our vector via email, iMessage, Twitter and so on, it will be a JPG version. I was quite disappointed, but not shocked by this. Creative Cloud is, after all, a subscription-based service, and this is Adobe’s way of ensuring that the free mobile apps are being used by subscribers and not freeloaders.


In any Adobe desktop application like Photoshop, InDesign or Illustrator, you can open a file stored in the Creative Cloud library by navigating to Window>Libraries and dragging the vector onto the canvas. Just make sure that your application is running the newest Creative Cloud updates, because Libraries and SVG support are both new features.


Photoshop? SVG? Huh?


Photoshop CC has supported SVG files since its last update on the 6th October 2014. If we wanted to use our vector in a non-Adobe application (for example Sketch App 3) we could make use of Photoshop’s new Extract Assets feature to export the SVG onto our desktop. Illustrator of course fully supports opening, editing and exporting SVG files splendidly.


Conclusion


Adobe Shape CC is an excellent, time-saving mobile app for designers that work with vector, especially for Creative Market shop owners that seek inspiration from anywhere and everywhere. If you’re ever away from the computer and you come across a shape that inspires you, or you’ve drawn something and you’re not near a scanner, use Adobe Shape, capture your moment, and it’ll be waiting for you in the Creative Cloud later.



getpaidtowrite-banner
How to Capture Vectors on Apple iOS with Adobe Shape CC