Showing posts with label iPad. Show all posts

Wednesday, May 6, 2015

10 Apps to Turn Your iPad Into a Bad Ass Drawing Tablet

iPad drawing apps are a dime a dozen. There are a million of them out there, ranging from the really great (such as Paper by FiftyThree) to the downright terrible. What if you want to get some real work done on an iPad though? In my view, to really turn my iPad into a professional drawing tablet, I need an app to do one of two things:


  • Allow me to work directly in Photoshop or Illustrator – If we’re talking real work, then I almost don’t even want a new app. Let me use the iPad’s awesome technology and UX to draw with the professional tools I already use, just like a Wacom tablet.

  • Give me vector or give me death – If a professional drawing app wants to live solely on the iPad, that’s fine, but it has to churn out vector art that I can export to Illustrator. This means a Pen Tool, editable shapes, boolean commands, the whole nine yards.

Great Mirroring Apps


First up are the mirroring apps. There are quite a few of these to choose from, but they tend to get pricey so you want to make sure your money is well-spent. I used to be an AirDisplay man, but AstroPad is definitely the new app to beat in this category.


AstroPad

drawing-apps


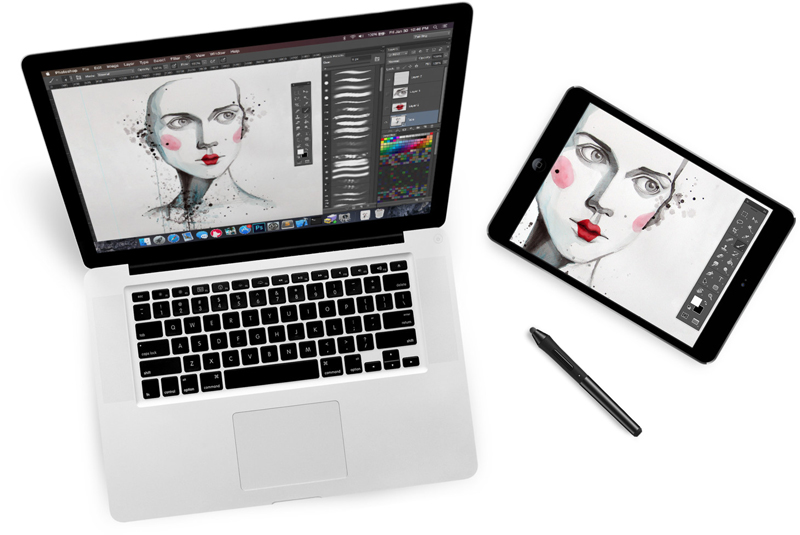
AstroPad is the newest entry into this category, and in my experience, easily the best. It gives you the ability to draw right in Photoshop or Illustrator on your Mac, with cool custom shortcuts, and almost no lag. This app offers the best quality of graphics on the market, and it costs .99 to purchase. One of the best parts about AstroPad is that it uses an up-to-date LIQUID technology that ensures you never lose the quality of the image you’re working with. Astropad also offers a student price for interested buyers, as well as a free trial.


AirDisplay

drawing-apps


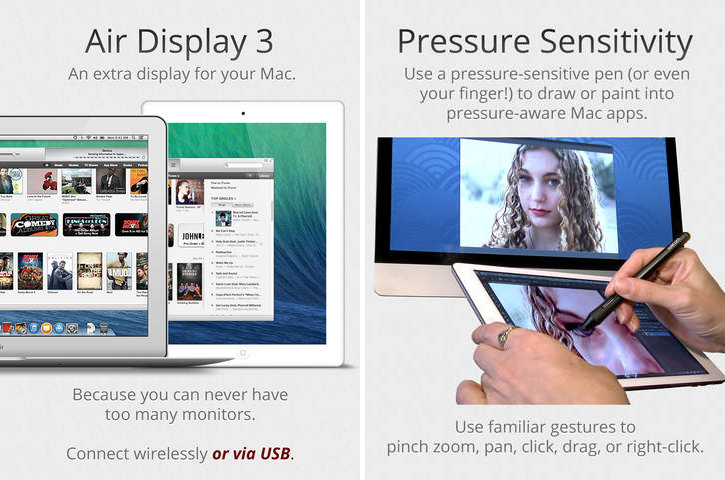
From the company Avatron comes AirDisplay, which is a great iPad app choice for any artist looking for an effective mirroring app. It offers the chance to mirror what you see on your tablet on up to 4 monitors at once. The app works using connection via wireless Internet connection, removing any annoying cords or USB cables and making for a comfortable and convenient drawing experience. Right now, AirDisplay is available for Apple devices, Android devices, and those that run Windows and can be purchased for .99.


AirStylus

drawing-apps


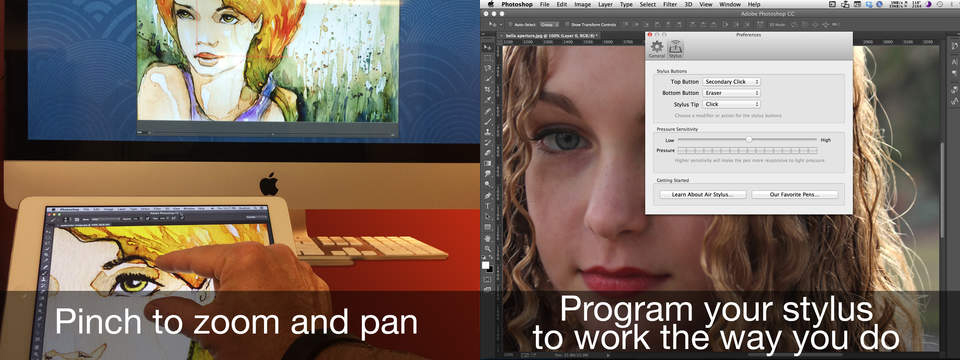
Avatron also makes Airstylus—an extension of AirDisplay that offers the ability to use their mirroring techniques on iPads as well as on iPhones and the Galaxy Note. The program allows artists to draw on their tablet via a stylus. Since it is very pressure sensitive, it’s perfect for work that requires accurate lines and fine, minute details. The stylus links wirelessly to your display, so there are no clunky cords to deal with. While Avatron has announced that they’re moving away from AirStylus in the near future, older versions of the AirStylus app are available in the App store for the iPad for .99.


SplashTop Remote

drawing-apps


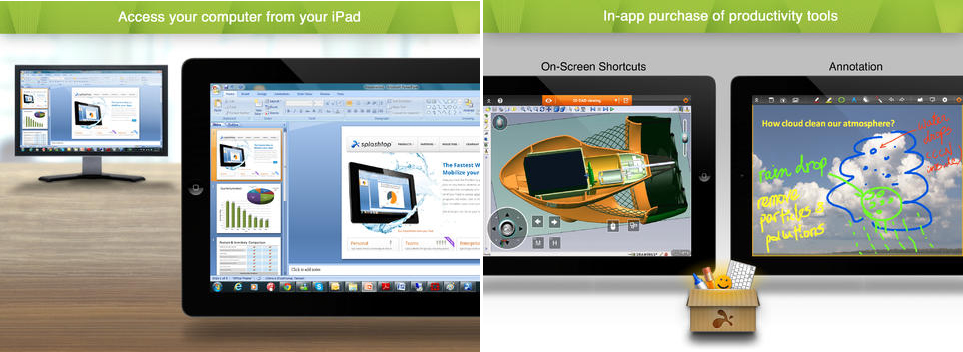
SplashTop remote is one of the most popular apps that allows users to control their computer from afar. The app offers the ability to control your computer from your iPad, and allows users to access things like videos, music, and more from your computer. Users can use their favorite art and drawing software from their computer via their iPad with SplashTop, which makes it a good choice for artists interested in convenience or moving around away from a desktop while they work. This app is currently offered for free when using your computer’s local network, but if “Anywhere Access” is purchased it will only cost users .99 per year.


iDisplay

drawing-apps


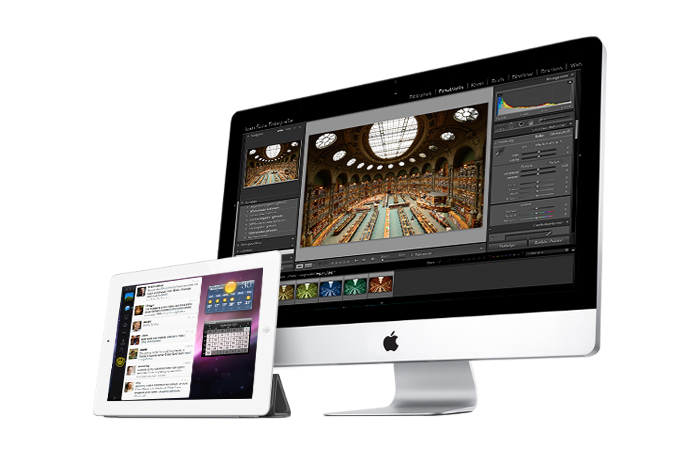
iDisplay is currently available for free on Mac OS X and Windows, and is a popular app that allows people to use their iPad as a second display. This app has it all for someone looking to draw via a table and offers more screen space because it is able to be connected to several wireless devices all at once. It’s also easily customizable when used with different devices.


Vector Drawing Apps


Now for the vector drawing tools, which are actually pretty impressive. For my money, iDraw is the closest thing there is to a native iPad version of Adobe Illustrator. It has a pen tool, layers, boolean commands, grids, snapping, effects, just about everything you could want. InkPad is a great alternative that’s completely free.


iDraw

drawing-apps


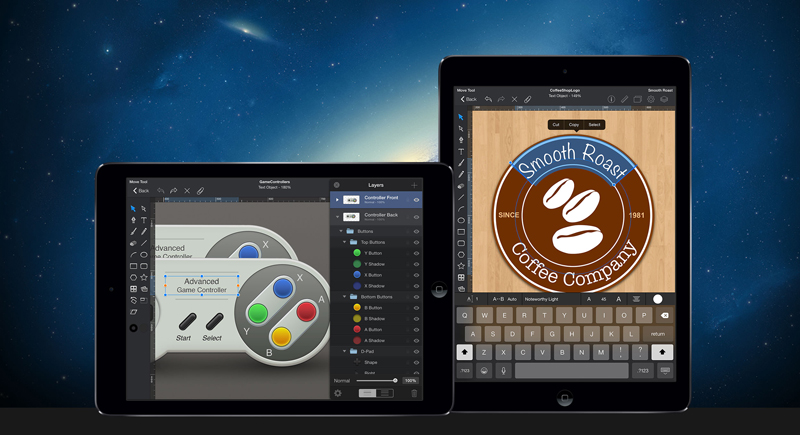
iDraw is one of the best vector drawing apps on the market, and it combines the convenience of an iPad with the power of a desktop. The app is easy to understand and is consistently top rated by all users. It’s simple to share edit designs between devices (like Mac and iPad). The app has some especially exciting functions, like core text editing, Photoshop import and export, and an In-Place Color Picker.


InkPad

drawing-apps


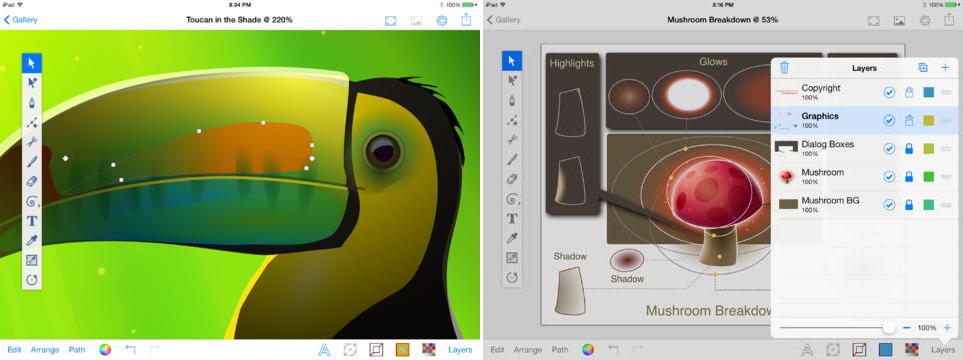
One great free vector drawing app for the iPad is InkPad, which was designed to work specifically on the device. It comes highly recommended by those who use it for its ease of text, images gradient fills, etc. Its selection of tools is close to that of Illustrator, and it is easy to use, even for beginners. If what you’re looking for is a powerful drawing tool and the lowest price possible, you can’t get better than this.


Intaglio Sketchpad

drawing-apps


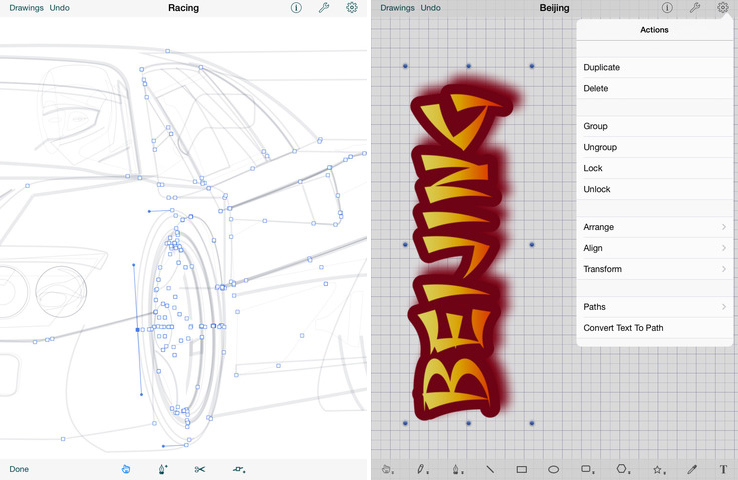
For a vector artist that is looking for something straightforward that functions really well, check out Intaglio Sketchpad, a tablet drawing app creating by Purgatory Design. The app has a full set of drawing tools, and it utilizes multi-touch technology.


TouchDraw

drawing-apps


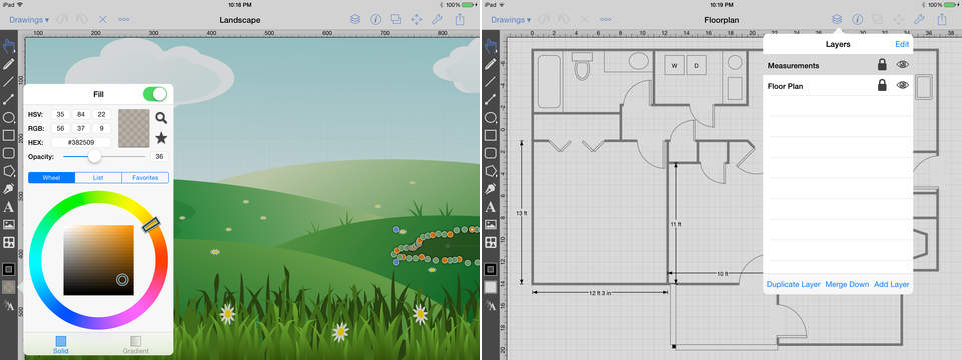
Elevenworks has created TouchDraw, which has all of the expected options of the 2D Vector drawing app and more. In fact, the app has most of the features of a desktop vector drawing app, and it can be used in conjunction with TouchDraw for Mac. TouchDraw has been rated as being one of the best vector apps available and is priced affordably at only .99.


iDesign

drawing-apps


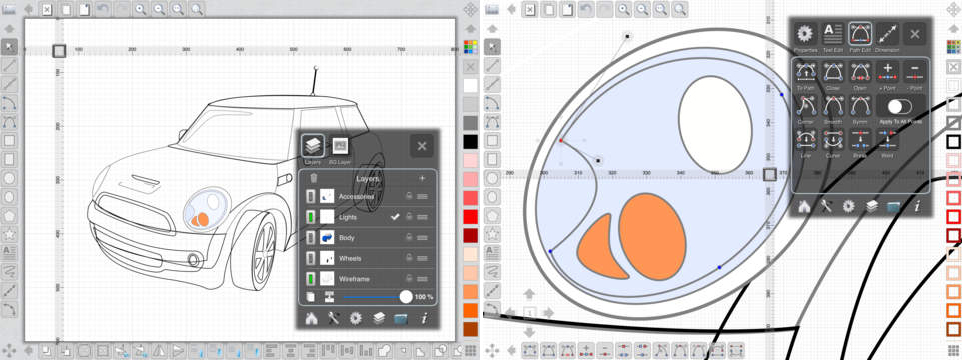
iDesign is currently one of the most popular vector apps on the market today and allows you to create 2D vector drawings on the iPad, iPhone and iPod touch. The interface of iDesign is simple to use and offers a huge selection of advanced, in-depth features. Some of these features include a full screen board view so your image isn’t obscured in any way and has offset handles for moving the screen, so your finger never gets in the way of what you’re trying to see. iDesign can be downloaded from the app store for .99.


Tell Us Your Workflow


Do you do professional drawing work on your iPad? Tell us about your workflow. Do you use a mirroring app like Astropad, a vector drawing app like iDraw, or something else? Leave a comment and let us know.


Products Seen In This Post:



getpaidtowrite-banner
10 Apps to Turn Your iPad Into a Bad Ass Drawing Tablet

Saturday, April 11, 2015

Use Your iPad To Generate Gorgeous Color Schemes

During this installment in our series of articles about Adobe’s “Capture” apps, we’ll learn how to extract color schemes from real life moments using the native camera on an iOS device and Adobe Color CC. While the app is available for both iPhone and iPad, we’ll be using the iPad to reference examples in this tutorial.


In the first article, we learned how to capture vectors with Adobe Shape CC, and in the second, we used a similar workflow to capture Photoshop brushes with Adobe Brush CC. Both times we learned how to store these resources in Creative Cloud and use them in desktop apps such as Photoshop, Illustrator and InDesign. Adobe Color CC is a little different. While the iOS app was released as a companion to Shape and Brush in late-2014, it was in fact formerly known as Adobe Kuler (before CC), but only as a web-app for manually creating and storing color schemes.


Making Your First Capture


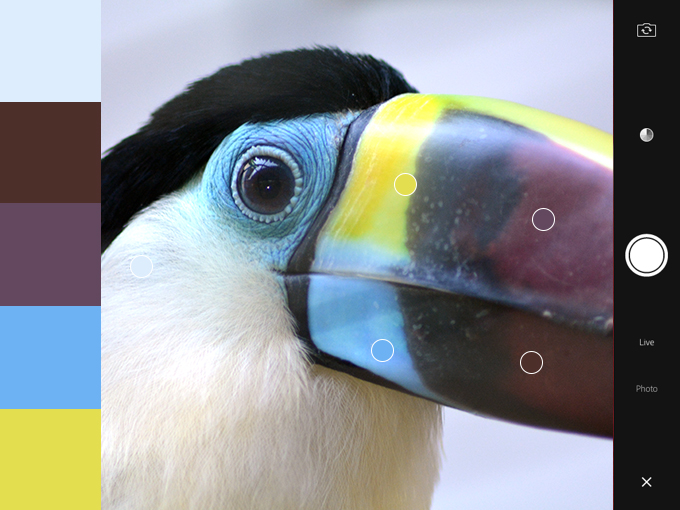
When you open the application for the first time, you’ll be on-boarded immediately and encouraged to make a capture. Adobe Color uses smart intuition to insert five “capture spots” on the screen where it thinks the most desired colors are – this is live and the spots can shift around if your balance is jittery, but luckily you can tap the screen to “freeze frame” and manually fine-tune the capture spots yourself.


adobe-color-4


For the best results, I’d recommend making sure that you’re either outdoors or in a room that’s well-lit with natural light; this will ensure that the captured colors are accurate, however it’s normal to want to intensify the colors, add a complimentary color to the scheme, or simply or output results that weren’t in the original capture. If you’re happy with your capture, tap the big, round camera/capture icon to continue.


Exercising More Control


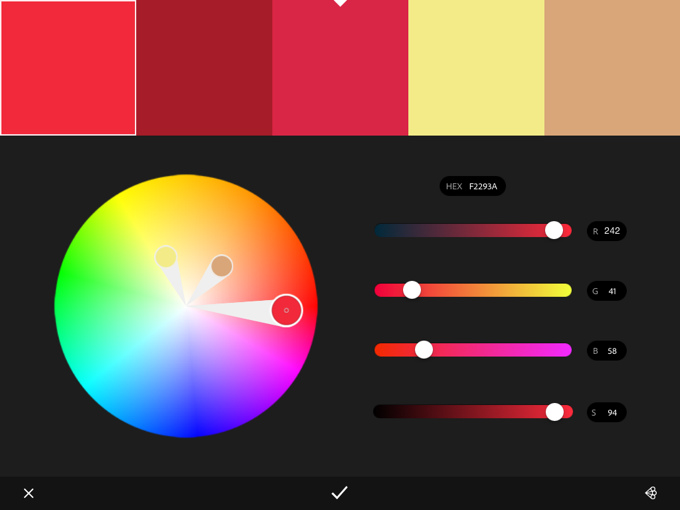
If you’re incredibly choosy (like most of us designers are!), you’ll want to tap the “color wheel” icon next. This will offer more technical control, such as the ability to alter colors by their HEX or RGB values. In the bottom-right corner of the screen, the “color scheme type” icon will let you choose to convert your color scheme to something more Analogous, Monochromatic, Triad, Complementary or Compound , this is the best way to try out and ultimately achieve effective color schemes based on a “rough” capture.


adobe-color


In short, Adobe Color is a useful application because it lets you exercise as much control as you like. It’s not uncommon to capture the desired color scheme in a single try, but more complex options are instantly available if you need them.


Press the “check” icon when you’re ready to save it.


I’ve Made a Color Scheme, Now What?


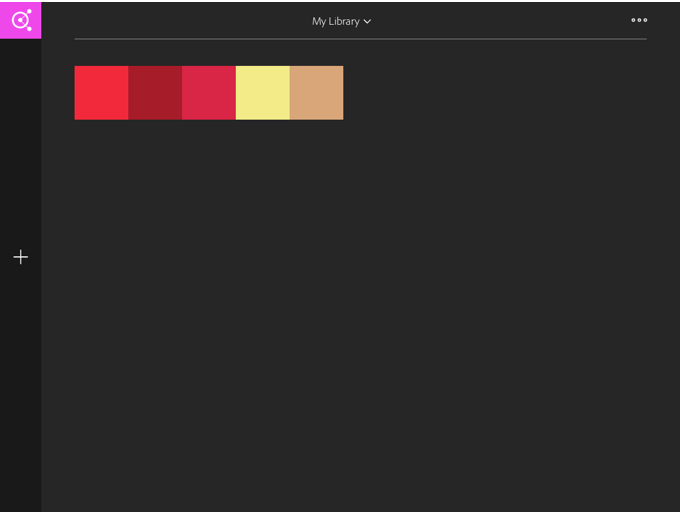
We’re almost done. At this stage you’ll be asked to name your theme, add comma-separated tags, optionally share it on social media channels…and all that jazz. Tap “Done” on the keyboard when you’re ready. For the first time, you’ll be shown “My Library” and your first color scheme will be clearly visible.


adobe-color


You can select the color scheme to either delete or make changes to it, or otherwise tap the “+” icon to create a new scheme, but for now we’ll explore the ways in which Adobe Color CC integrates with the Creative Cloud. At the top (middle) of the screen you’ll be able to tap “My Library” and create a new one, or if you’ve used the web-app version of Adobe Color before, you can explore the themes from that in a separate library. The three-dot “more” icon in the top-right corner of the screen lets you rename, delete, or setup a collaboration for the library currently selected; this is useful if you work in teams.


Finding Creative Cloud Libraries in Desktop Apps


You can now use these color schemes in Photoshop, Illustrator and InDesign by navigating to Window → Extensions → Adobe Color Themes in any of those desktop applications. Adobe’s lesser-known code editor, Brackets, also has native Adobe Color CC functionality, so your color schemes can be easily imported into web designs too. When the time comes to choose a color, Adobe Color CC will be available as an option.


Conclusion


Adobe has come so far in the last 12 months in terms of mobile, continuity and cloud-based software, and this means big things not only for designers, but for Creative Market shop owners too. It’s now even easier to capture real life elements such as brushes, vectors and colors all within an Adobe workflow.


Employing the use of digital SLR cameras and scanners to import hand-crafted material is no longer needed, and I for one am deeply excited to see Creative Market resources being created with these new mobile apps. I have a couple in the works myself!


Products Seen In This Post:


Share on Pinterest
Share on Pinterest
Share on Pinterest


getpaidtowrite-banner
Use Your iPad To Generate Gorgeous Color Schemes

Thursday, March 19, 2015

How to Create Amazing Photoshop Brushes on Your iPad

In my last article I wrote about Adobe Shape CC, one of the new mobile apps that Adobe released to the Apple iOS app store in late 2014, which allows us to capture real life elements with the device camera, convert them to vector and save them into the Creative Cloud for further use in Adobe’s desktop applications (Photoshop, Illustrator, InDesign, et cetera).


In this article we’ll be exploring a similar workflow with one of Adobe Shape’s companion apps, Adobe Brush CC. Adobe calls these “capture” apps and they’re especially useful for hands-on designers. When you’ve installed the application on your iOS device and signed in with your Adobe ID, we’ll continue with the next step — learning the interface.


FYI: I’m using an iPad for this tutorial; the iPhone interface may differ slightly.


Adobe Brush’s Interface


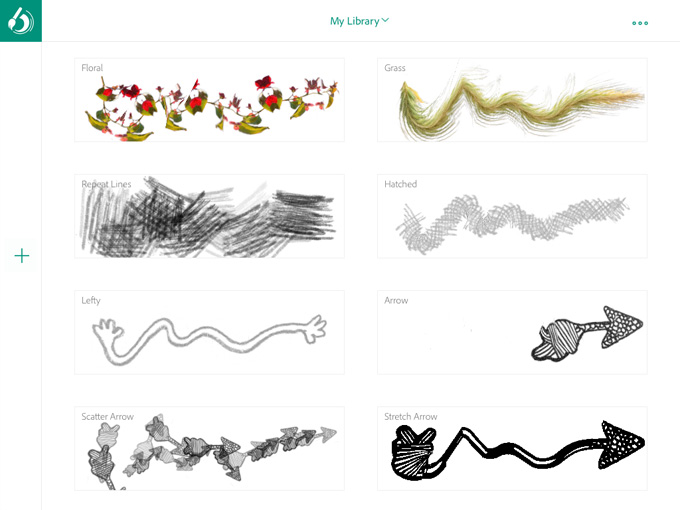
At first you’ll be shown My Library. I’ve come to realize that with Adobe mobile apps this is rather normal, however, Adobe Shape took me straight into the camera mode and showed me how to capture a vector, which I felt was more useful. Nonetheless, lets explore the interface while it’s here.


In the top-left corner of the device screen you’ll see the Adobe Brush CC logo — there’s nothing interesting here; only things related to Adobe and your Creative Cloud subscription.


Skip on over to the other side and there will be a three-circle icon — this will let you rename your library of brushes or select a friend to collaborate on this library with. If you’d like to create a new library, click My Library>Create New Library from the top-middle dropdown field.


So there you have it, brushes and libraries to store the brushes in.


Step 1: the interface


Creating a Brush


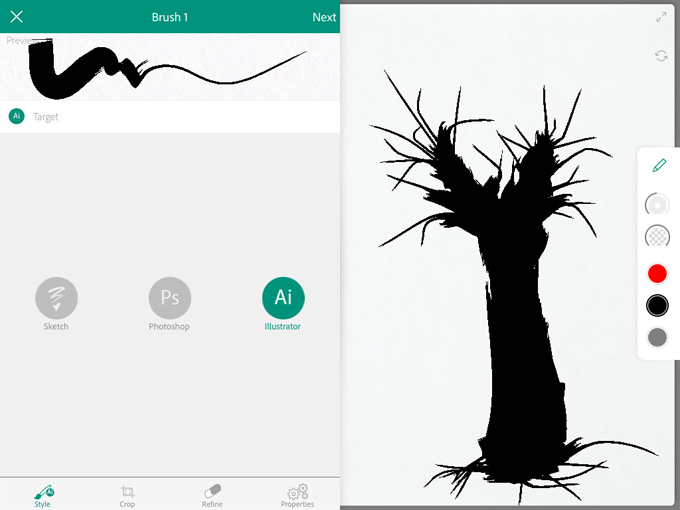
Press the “+” icon (on the left) to initiate a capture. If you don’t already have an image in the Camera Roll or in your Creative Cloud that you’d like to use, select “Camera” and take a snapshot of your hand-drawn brush. For this exercise I applied vermilion acrylic directly from the tube (no brush) onto the canvas in my notebook, and as you can see from the screenshot below, it comes out quite thick. Choose Illustrator in the next screen and tap “Next”.


Brushes work differently depending on the application they’re used in. Illustrator brushes are vector and use the .ai filetype, whereas Photoshop uses .abr, and isn’t vector. It’s important to understand that Illustrator brushes will not work in Photoshop, and vice-versa. You’ll need to create a brush for each application.


Step 2: creating a brush


Our Brush Is Like a Worm


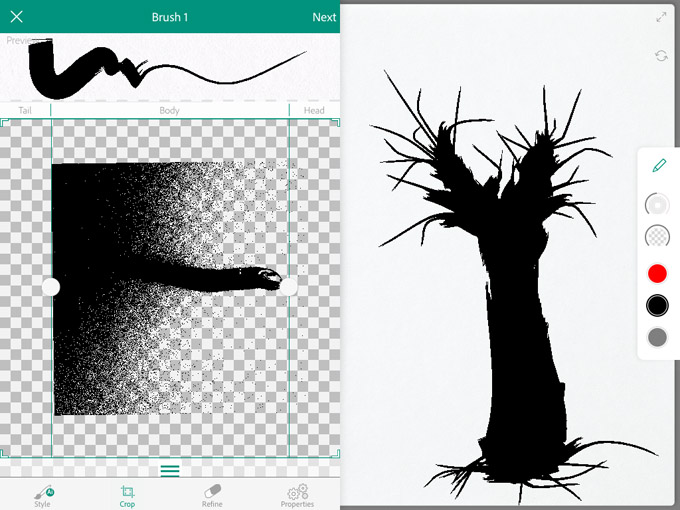
Have you ever seen a worm and wondered which side was the head, and which side was the tail? Well, our brush is like a worm and we need to establish its anatomy. Luckily, we can use two intuitive touch gestures (panning and rotating) to clarify this; the aim here is to crop unwanted areas.


In the case of this example, I want to keep the entire thing, and so I’ve moved the capture directly in-between the Tail and Head lines. Anything outside of the Body area is cropped. Don’t worry about about the quality of your capture for now, we’ll have the chance to refine it in the next step.


Press “Next”.


Refining the Capture


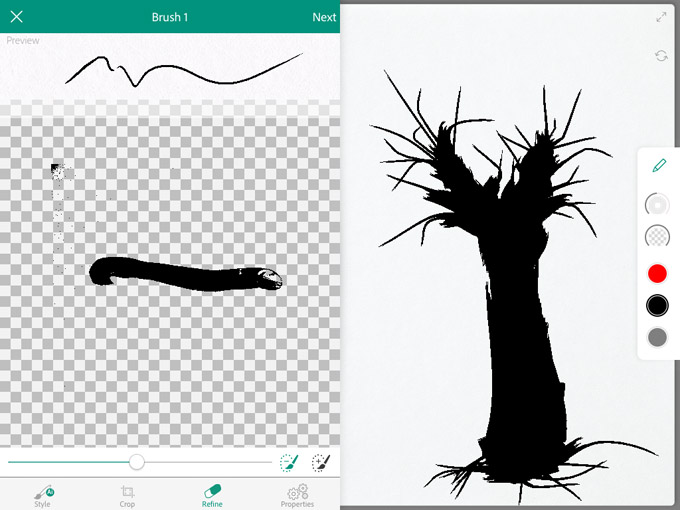
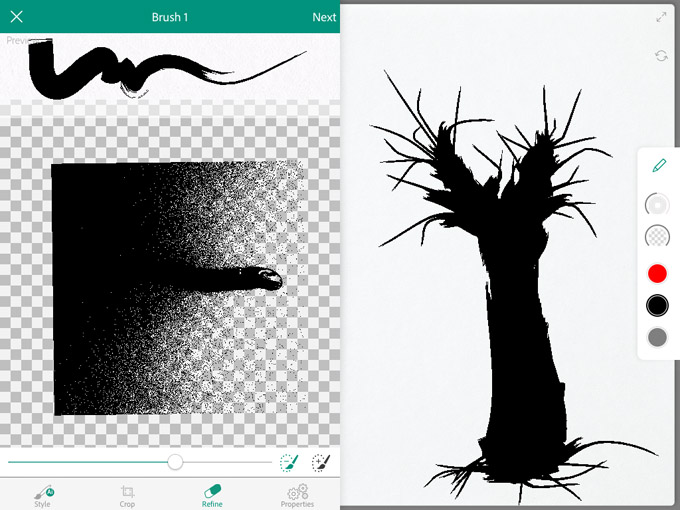
What’s most important in this screen is the Threshold scrubber. If you observe the two examples below you’ll notice the difference between low and high threshold, but this feature is available in both Photoshop and Illustrator so I’m sure you’re familiar with it. Just remember that the “Preview” (above) is how your brush will appear, and for good measure it’s always advised to test your brush on the actual canvas (right).


If something is amiss, simply erase it on the canvas with a swipe, and when you’re satisfied with it, tap “Next” again to continue to the next step.


Step 3: refining the capture, low threshold
Step 4: refining the capture, high threshold


Last Minute Tweaks


In this final step we’ll be able to change both the Size and Pressure of our brush, but because this is a trial-and-error approach, you’ll need a blank canvas; the top-right icon will offer you more canvas space and the icon below that will wipe it clean. If you’re not able to yield any desirable results you can can click on Style, Crop or Refine and alter those settings again.


As you can see, I have a rather flat edge on the head of my brush and that’s caused by the combination of high threshold and bad lighting. I actually rather like it, but if you’re going for accuracy, the trick is to capture your brush in flawless lighting. Outdoor, natural light works best.


Step 5: last minute tweaks


I’ve Created a Brush, Now What?


Press “Save” — now the brush is in your library. It’s non-destructive, so you can continue tweaking and testing it later on, but in the meantime it’s automatically synced to your Creative Cloud. You can use your library assets in both Illustrator and Photoshop by navigating to Window → Libraries.


Conclusion


If you followed this mini-tutorial then you successfully made a brush using an iPad, and I think that’s very impressive. If you’re into illustration and vectors too, don’t forget to read my other tutorial on Adobe Shape CC.


Popular Photoshop Brushes


Share on PinterestShare on PinterestShare on PinterestShare on Pinterest


getpaidtowrite-banner
How to Create Amazing Photoshop Brushes on Your iPad