In my last article I wrote about Adobe Shape CC, one of the new mobile apps that Adobe released to the Apple iOS app store in late 2014, which allows us to capture real life elements with the device camera, convert them to vector and save them into the Creative Cloud for further use in Adobe’s desktop applications (Photoshop, Illustrator, InDesign, et cetera).
In this article we’ll be exploring a similar workflow with one of Adobe Shape’s companion apps, Adobe Brush CC. Adobe calls these “capture” apps and they’re especially useful for hands-on designers. When you’ve installed the application on your iOS device and signed in with your Adobe ID, we’ll continue with the next step — learning the interface.
FYI: I’m using an iPad for this tutorial; the iPhone interface may differ slightly.
Adobe Brush’s Interface
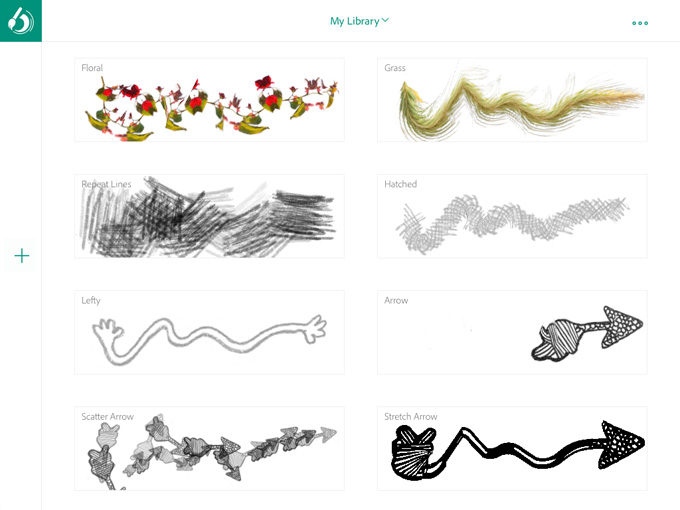
At first you’ll be shown My Library. I’ve come to realize that with Adobe mobile apps this is rather normal, however, Adobe Shape took me straight into the camera mode and showed me how to capture a vector, which I felt was more useful. Nonetheless, lets explore the interface while it’s here.
In the top-left corner of the device screen you’ll see the Adobe Brush CC logo — there’s nothing interesting here; only things related to Adobe and your Creative Cloud subscription.
Skip on over to the other side and there will be a three-circle icon — this will let you rename your library of brushes or select a friend to collaborate on this library with. If you’d like to create a new library, click My Library>Create New Library from the top-middle dropdown field.
So there you have it, brushes and libraries to store the brushes in.
Creating a Brush
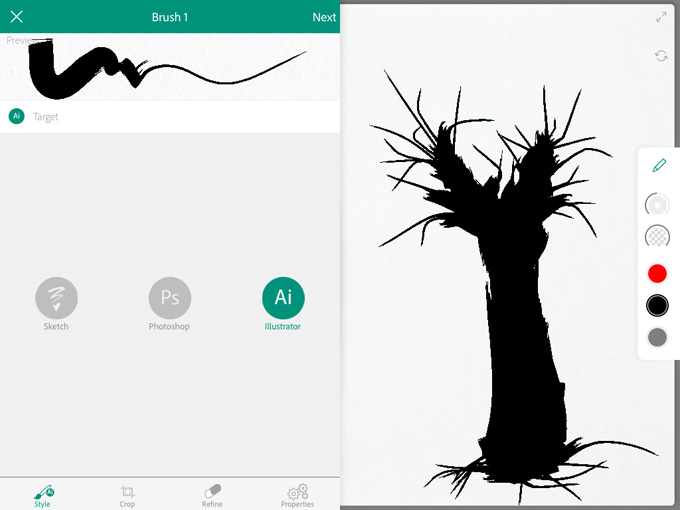
Press the “+” icon (on the left) to initiate a capture. If you don’t already have an image in the Camera Roll or in your Creative Cloud that you’d like to use, select “Camera” and take a snapshot of your hand-drawn brush. For this exercise I applied vermilion acrylic directly from the tube (no brush) onto the canvas in my notebook, and as you can see from the screenshot below, it comes out quite thick. Choose Illustrator in the next screen and tap “Next”.
Brushes work differently depending on the application they’re used in. Illustrator brushes are vector and use the .ai filetype, whereas Photoshop uses .abr, and isn’t vector. It’s important to understand that Illustrator brushes will not work in Photoshop, and vice-versa. You’ll need to create a brush for each application.
Our Brush Is Like a Worm
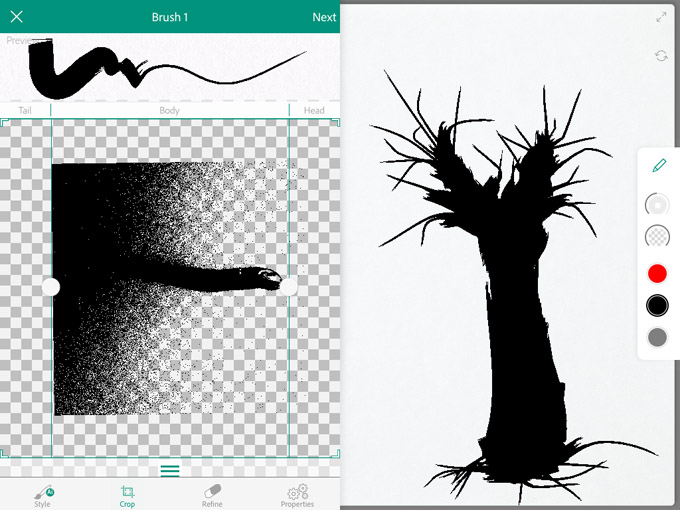
Have you ever seen a worm and wondered which side was the head, and which side was the tail? Well, our brush is like a worm and we need to establish its anatomy. Luckily, we can use two intuitive touch gestures (panning and rotating) to clarify this; the aim here is to crop unwanted areas.
In the case of this example, I want to keep the entire thing, and so I’ve moved the capture directly in-between the Tail and Head lines. Anything outside of the Body area is cropped. Don’t worry about about the quality of your capture for now, we’ll have the chance to refine it in the next step.
Press “Next”.
Refining the Capture
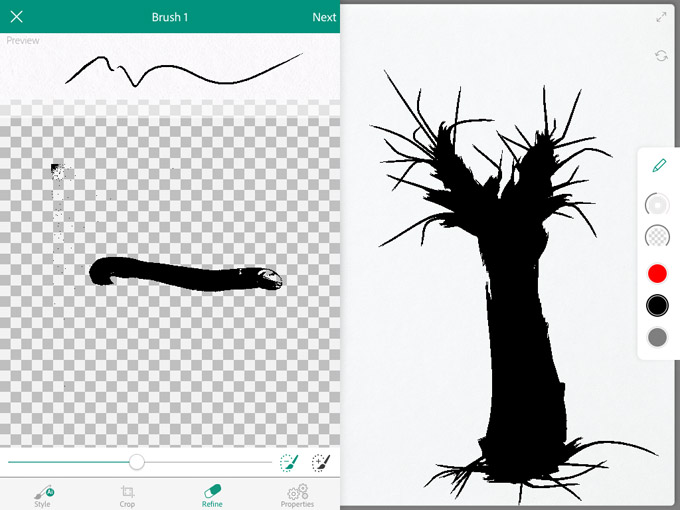
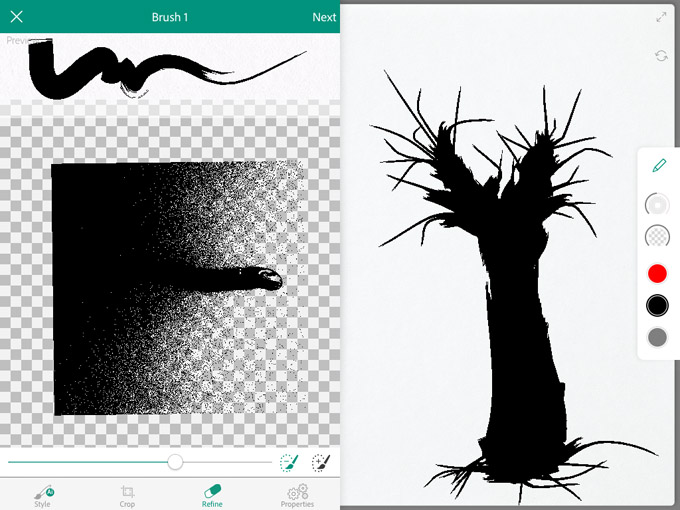
What’s most important in this screen is the Threshold scrubber. If you observe the two examples below you’ll notice the difference between low and high threshold, but this feature is available in both Photoshop and Illustrator so I’m sure you’re familiar with it. Just remember that the “Preview” (above) is how your brush will appear, and for good measure it’s always advised to test your brush on the actual canvas (right).
If something is amiss, simply erase it on the canvas with a swipe, and when you’re satisfied with it, tap “Next” again to continue to the next step.
Last Minute Tweaks
In this final step we’ll be able to change both the Size and Pressure of our brush, but because this is a trial-and-error approach, you’ll need a blank canvas; the top-right icon will offer you more canvas space and the icon below that will wipe it clean. If you’re not able to yield any desirable results you can can click on Style, Crop or Refine and alter those settings again.
As you can see, I have a rather flat edge on the head of my brush and that’s caused by the combination of high threshold and bad lighting. I actually rather like it, but if you’re going for accuracy, the trick is to capture your brush in flawless lighting. Outdoor, natural light works best.
I’ve Created a Brush, Now What?
Press “Save” — now the brush is in your library. It’s non-destructive, so you can continue tweaking and testing it later on, but in the meantime it’s automatically synced to your Creative Cloud. You can use your library assets in both Illustrator and Photoshop by navigating to Window → Libraries.
Conclusion
If you followed this mini-tutorial then you successfully made a brush using an iPad, and I think that’s very impressive. If you’re into illustration and vectors too, don’t forget to read my other tutorial on Adobe Shape CC.
Popular Photoshop Brushes
Share on Pinterest Share on Pinterest
 Share on Pinterest
 Share on Pinterest

How to Create Amazing Photoshop Brushes on Your iPad
No comments:
Post a Comment
Note: Only a member of this blog may post a comment.