Showing posts with label Better. Show all posts

Thursday, June 18, 2015

Spotify"s New Green: Better or Worse?

Branding is a funny thing. Do it right, and people worship what you’ve done. Do it wrong — or what people perceive as wrong — and you’ll get crucified. Now let me introduce you to Spotify.


You’ve heard of Spotify, right? They’re a streaming music service, and they’ve been in the news a lot recently, since Apple’s setting up to take them on with Apple Music. It turns out that Spotify decided to do a little rebranding as well, and tweaked their logo slightly. The issue seems to be the green.


spotify


The old version — referred to as “broccoli” green by Spotify themselves — was a gradient of colors. Using Sip, I’m guessing that the original logo was a gradient from #AACE4B to #7BB546 or thereabouts. As for the new version, that’s #23CF5F all day long.


What have people had to say about it? Well here you go:


What’re your thoughts about the color change?


Kevin Whipps is a writer and editor based in Phoenix, Arizona. When he’s not working on one of the many projects in his queue, he’s looking for fun and irreverent things online to share with his friends.
Spotify"s New Green: Better or Worse?

Monday, June 8, 2015

How a Culinary Technique Could Make You a Better Freelancer


Today I’m going to tell you the story of two cooks: David and Jenny. Both are equally talented in the kitchen, and both are about to prepare a 6-course meal for a table full of rowdy dinner guests. They’re hungry and they’re hungry now.


David gets his pots and pans out, pulls what he needs from the fridge as it’s needed, and dives hands first into the cooking. He likes to follow his gut, and make the magic happen spontaneously. In the other room, his guests are talking and making quick work of the wine and the asparagus dip, and David is in the zone.


Pan over to Jenny. Jenny is a more methodical cook – she opens up her recipe book and starts pulling out everything she needs to complete the meal. No cooking yet – just preparation. It takes her awhile, but she manages to arrange all of her utensils and ingredients in neat groups.


Everything is pre-measured; not even a speck of flour is spilled on the countertop. Her guests are just as rowdy and are drinking just as copiously, but Jenny will not begin until she’s certain that everything is in its proper place. Finally, she begins to cook, following a rigid schedule, almost like a surgeon.


boy screaming on dining table waiting for food
Image Source: Waiting for Food via Shutterstock.


So, who do you think made the better meal? I dunno – you’d have to ask the guests! But that’s not the question our little story was intended to ask. The question is: who served their guests faster?


If you guessed Jenny, you’re absolutely right. All other things being equal, Jenny was the one who would have been able to produce a large quantity of food in record time, all to the exact same quality standards, so that her hungry, hungry guests would be satisfied.


Why? Because she did something that all professional chefs do every single day. We’ll get to what that is in a minute. David may have been able to pull it off with his more lackadaisical approach, but with a dozen starving guests all waiting to eat ASAP, who wants to take that kind of risk?


Breaking It Down


Let’s look at what made Jenny come out ahead of David in the time management department. Obviously, she was careful in her approach, but there’s more to it than that. Jenny used what’s known in the culinary industry as “mise en place.” Mise en place is a fancy French term that simply means “everything in its place.” Feel free to blurt it out the next time you’re eating out with your friends. You’ll either look like a super sophisticated foodie, or a total pretentious dork.


Anyway, all professional cooks use mise en place to help them get organized. When you’re working in a commercial kitchen, you don’t have time to guess or estimate how much of this ingredient you need, or how much time that dish will take to cook. You have to know beforehand – otherwise you fall behind and you won’t be able to produce the hundreds of plates that pass through the average restaurant kitchen each night.


Image Source: Mise En Place via Shutterstock.


Just as a pro never starts cooking before setting up all of their ingredients and cooking utensils, a designer should never just jump into designing without everything being “in its place” first. This means setting up obvious things, like your tools, hardware, materials, reference, wireframes, et cetera – but it also includes stuff you might not think to finalize before you get started.


Like your client contract, which details specifically when you expect to get paid, how much, and what your ETA is for getting work done. Or your client survey or questionnaire, in which you get down to the nitty gritty of what your clients are looking for, not just for your current project, but in general. This gives you a framework for determining what your clients are expecting to get, and will help you figure out how to give it to them.


Other things, like standards checklists, bookkeeping, revision planning, and, my favorite: a plan to properly present and sell your ideas to your client, are massively important to making sure everything runs smoothly. These might not be the most exciting things to check off your to do list, but they are some of the areas in which designers most frequently run into trouble when not done properly.


Notebook, Smartphone, Eye Glasses, and Pen
Image Source: Notebook, Smartphone, Eye Glasses, and Pen via Shutterstock.


How many times have you heard of freelancers who failed to communicate a brilliant idea to their client, all because they never prepared or rehearsed what they were going to say in the meeting? Or a designer who got so caught up in tiny little scope creeps that didn’t seem so bad until suddenly they realized they’d done thousands of dollars of work for a client who had no intention of ever paying them for it?


We’ve all heard of these unfortunate case; perhaps we’ve even been there ourselves. But so much of what constitutes “client burn” is preventable with steady and persistent attention to detail, to making sure every piece of the puzzle is accounted for before the work begins.


Right Brain Or Left Brain?


There’s a philosophy among some designers and artists that the creative process, being, well, creative, should be less restrained and more intuitive. “Going with your gut” and engaging your “right brain” are the most important things, so the argument goes, to harnessing maximum creativity.


Which is great, if you’re a more free spirited creative who shines through relentless experimentation and abstract investigating. I’m not too sure I buy into the idea that people use one side of their brains more than the other, but the general idea of certain people being more suited to certain work styles is pretty valid.


Left and Right Brain
Image Source: Left and Right Brain via Shutterstock.


Right brained freedom is fine and all, if that’s who you are as a designer. But if, like me, you consider yourself more methodical in your approach (in case you couldn’t tell, I’m much more a “Jenny” type of cook – and designer – than a “David”) that’s perfectly fine as well.


Left brain dominant people are no less creative than right brained ones, and there’s even plenty of evidence to suggest that control and limitations actually help boost your creativity in many cases. If you’ve ever been to design school or taken a class in any creative discipline, you’ll know that instructors rarely tell you to “do whatever you want.” They give you guidelines and limitations to work inside of, which at first might seem to be limiting your creativity. But a wise instructor knows that the opposite is actually true.


Young man in the process of thinking and finding a solution
Image Source: Process of Thinking and Finding a Solution via Shutterstock.


The creative process usually goes faster if you plan ahead and work inside of limits. Simply jumping in is not only confusing to many people, it’s more likely to be non-productive if you don’t have the right temperament for it. If you find yourself struggling with conventional creative wisdom that tells you to “just dive in,” try doing the opposite of that instead.


Indulge your inner accountant or engineer, and meticulously plan out a creative project the same way you might plan a wedding ceremony or a major travel itinerary. You might just discover a powerful set of creative muscles that have been hiding in plain sight.


Living the Mise en Place Life


Mise en place is more than simply physically preparing to do something complex or challenging. It is a state of mind. Think of it as almost like a meditation ritual or a personal philosophy that guides your ethical judgement.


When you incorporate the mise en place idea into your business and creative process, it provides your brain with lubrication, just like putting oil in your car. You prepare yourself to power through your work with less stress and fewer headaches, which means you can take on more work and get paid more for the value you provide to your clients.


What Do You Think?


How do you prepare before you start a design project? Do you find it more helpful to be methodical and detailed, or are you more “right brained” and intuitive? Let us know in the comments.


The post How a Culinary Technique Could Make You a Better Freelancer appeared first on Speckyboy Web Design Magazine.


How a Culinary Technique Could Make You a Better Freelancer

Thursday, June 4, 2015

These Gorgeous Brand Style Guides Will Inspire You To Be a Better Designer

When you’re putting together a brand, you want to make sure that you have all the bases covered for every possible scenario — but there’s no reason to make it boring. Canva found 50 style guides that go above and beyond the norm, creating both beautiful and functional results. We’ve selected 12 of our favorites right here for you to check out. Enjoy!


Skype


Ollo


Animal Planet


Barnes & Noble


Medium


Child of Light


Bing


Heineken


Swisscom iO


Apple


Jamie Oliver


Foursquare


Want more? Check out Canva for the full set!


Kevin Whipps is a writer and editor based in Phoenix, Arizona. When he’s not working on one of the many projects in his queue, he’s looking for fun and irreverent things online to share with his friends.
These Gorgeous Brand Style Guides Will Inspire You To Be a Better Designer

Thursday, May 21, 2015

How CRAP Will Make You a Better Designer

Once upon a time, I was a teenager who knew Photoshop inside and out, but I was pretty clueless when it came to design principles. I had a feel for what worked and what didn’t, but no explicit knowledge or training.


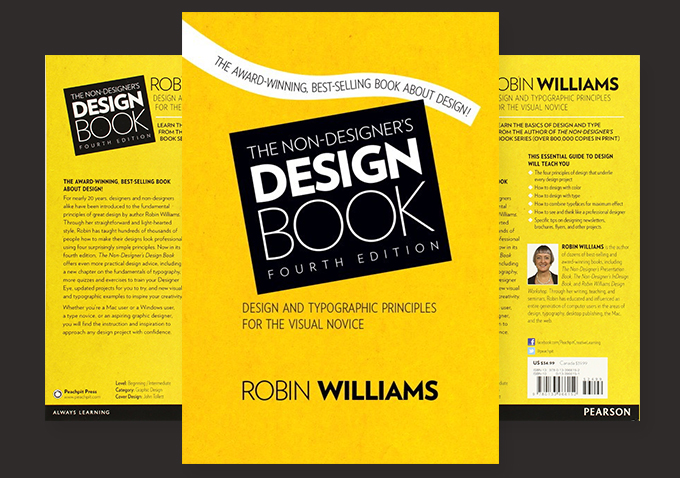
The very first book I ever picked up on design was called “The Non-Designer’s Design Book” by Robin Williams (no, not that Robin Williams), and I can honestly say that it changed my life. It used brilliantly simple and memorable concepts to teach anyone how to create great-looking designs, and it ignited in me a passion for simple, effective design that still drives me today. The core of Robin’s message is the proper use of Contrast, Repetition, Alignment, and Proximity (CRAP) in everything you create. The following is a simple introduction to these concepts.


Contrast


Use contrast to direct the viewer’s attention and create distinction between elements. A lack of contrast can make designs look lackluster and difficult to navigate. Contrast should be leveraged for both graphical and typographical elements.


Repetition


Repetition is the key to attractive, consistent designs. Repeat colors, text treatments, and graphics to create visual connections and establish a strong visual style.


Alignment


Every item on your page should be intentionally positioned, not arbitrarily placed. Line up objects where appropriate both vertically and horizontally. Remember that alignments are a communication tool. Many designs are built on simple, pixel perfect grids, but others use more organic layouts to convey a more natural or casual tone.


Proximity


The principle of proximity states that objects or statements that are related belong together on the page. Use logical groupings of graphics and messaging to convey contextual relationships and put plenty of whitespace between items that should be distinct.


CRAP Infographic


To help you remember to incorporate these principles into everything you create, we made a handy infographic for you to pin or bookmark.


CRAP


A Brief Interview With Robin Williams


In a moment of pure geeky pride, I was able to ask Robin a few questions about her thoughts on design. Here’s what she had to say.


1. In a web-driven world focused on learning HTML & CSS, do you think there’s a lack of basic design education?


Robin: My experience has been that there are generally two different mind-sets: those who enjoy the left-brain coding and those who are more right-brain visual designers. Anyone who can combine the two skills is of course more competitive, and more and more designers are needing to learn the basic coding skills, and vice versa.


A similar process happened when the Mac came out and changed the world of print design: there used to be a clear demarcation of skills—visual designers came up with the vision, then skilled production people executed that vision and got it printed. But print designers now must know how to execute the vision themselves, not the least of which reason is that they need to know the software in order to know what the possibilities are.


But the web is so much more complex than print design. Even the best combination of a code-and-design mindset working on a large and deep site will soon get to a point of needing an excellent technician who loves code and a brilliant designer who understands information design.


But as in every field, the more one knows about the other aspects of the field, even if you are not hands-on in that particular area, the more valuable you are and the more you can utilize the potential of both design and code.


I have personally decided that I love print design. I love it when I put text and graphics on a page and they stay right where I put them. It makes me very happy.


2. Why should non-designers care about basic design principles? 


CRAP


Robin: It is just a fact in our world that we instantly judge things visually. We can’t help it; in fact, we need to make instant judgments just to get through a day: Think of dating—in a room full of potential dates, I guarantee you scan the room and immediately dismiss ninety percent of the people in it because their visual presentation is not what you are looking for. When buying a new watch, you scan the collection to narrow down the possibilities. Of course, we might occasionally miss out on something valuable this way, but in general our visual snap judgments are necessary to provide some sort of parameters within which we can function effectively. It helps us create order out of complexity.


Knowing this is how humans automatically operate means that we each have an obligation to be conscious of the design aspect of everything we create. People respond to the clarity of a well-designed piece and, like it or not, a well-designed piece (of anything) gets noticed more readily and is more respected.


I have found over the years that having basic design skills has been an asset in every aspect of my life. My school essays look better, my handouts for students garner more respect, my reports to colleagues have a professional appearance. I have control over things like party invites and favors, games and prizes, thank-you notes and small signage. I can create a variety of persuasive and informative presentations that come in handy in all sorts of areas of my life. I can create great product on sites like CafePress, Zazzle, and PrintPlace. The basic design principles help me dress, bake a pie, and decorate a room.


Having design skills has opened up the possibilities in my next career, one which I could not have explored otherwise—developing reading editions of Shakespeare plays designed specifically for reading the plays out loud and in community, and an ongoing series of booklets about tidbits of stuff in the Shakespearean plays. I just completed a Ph.D. in Shakespeare and my design skills helped in the organization of my research, the creation and professional appearance of the charts and tables I needed, the presentation of my thesis within the specific parameters of scholarly work, and they will provide me with a future in another field altogether different from the one in which I’ve worked for the past thirty-five years. Design skills fulfill Rule Number Two: Maximize your options. :-)


3. What are some of your favorite resources for designers right now? (websites, books, tools, etc.)


Robin: I love all the template-based options for people who feel uncomfortable in the design process (and coding), although of course if you can design or code you can take things even further. Canva.com is amazing and useful and brilliant for those new to design and even for trained designers as another outlet. I love the proliferation of inexpensive stock photo sites that make design and inspiration easier.


Of course your site is one of my most favorites—such a remarkable resource! Lynda.com is amazing and can change your life. And I recommend anything that John Wade produces—BAmag.com, his videos, his forum called The Grid, and his print books.


Thanks Robin!


A huge thank you to Robin for taking the time to answer my questions and share her design principles. Be sure to check out all her great books and videos. If you read and enjoyed The Non-Designer’s Design Book, leave a comment below and let Robin know about it.


How CRAP Will Make You a Better Designer

Monday, April 20, 2015

Insider’s Tips for Better Content Writing


It doesn’t matter whether you are a blogger, freelance writer, professional writer, or a student; you can always benefit by elevating your content writing skills.


The quality of your content usually suffers when you produce great quantity. Professional writers have discovered a few strategies that enable them to avoid that trap. The following tips and tools will help you produce a steady stream of great content.


retro typewriter with white paper page on wooden table. vintage style toned picture
Image Source: Retro Typewriter via Shutterstock.


The Research Doesn’t End When the Writing Starts


The first thing we should learn from professional writers is to preserve the research mode throughout the entire writing and editing process. Many content writers make the same mistake: they conduct a basic research and use those sources without bothering to get new ideas along the way. Creativity is an ongoing journey; you cannot limit it to a certain stage.


These tools will help you conduct an effective research:


  • Pocket – When you find an interesting online source you could use, but don’t have the time to read it, you can put it in Pocket – an app that enables you to save and organize articles, videos, and other types of online content directly from your browser. The best part is that you don’t even need an Internet connection to read these materials when you’re ready for them.

  • Google Trends – Throughout the research and writing stage, you need to keep track of the popular keywords that are trending in Google search. This is a simple, but powerful tool that will help you create search-friendly content.

  • Google+ – If you don’t want to be distracted by fancy tools and apps when conducting a research, Google+ can serve just as well. All you need to do is create an empty circle named “research”, “sources”, “ideas”, or anything else that will help you identify it. Then, use it to keep track of the online sources you would like to use in your content.

Focus


Rambling won’t get you anywhere. You need to clarify what you’re going to talk about right from the start, and stay away from digressions. Every piece of content you create should have only one point. Otherwise, it will be confusing for the readers. These tools will help you create focused content:


  • WordCounter – When you plan the development of your article, you should include a word count goal. Then, use this tool to see if you went overboard with unnecessary arguments. WordCounter is much more than a word and character counter; it also identifies repetitive words and phrases that are diluting your message.

  • Piktochart – The best way to present focused content with clear facts is to create an infographic. You don’t need advanced skills to do that; Piktochart is an awesome tool that helps you create data-driven content from scratch. All you need to do is pick a template and customize it with unique images and content.

A man is sitting on a sofa and writing notes in a notebook
Image Source: Writing Notes via Shutterstock.


Organization Is the Key to Success


The creative process of writing can become messy sometimes. You get more ideas than you could possibly include in the piece you’re creating. In addition, you have to think about time management if you want to get the work done on time.


There are two types of professional writers: those that find the mess inspiring; and those that find effective ways to make the writing process more productive. Experiment with the following tools to find out if you can improve your writing skills with proper organization:


  • Evernote – This app enables you to save any ideas, documents, or online sources into organized folders and tags. You can create a separate folder for each writing project and find the memos whenever you decide to go back to it.

  • IFTTT – If you use different apps and websites during the writing process, you can keep them under control with a single tool – IFTTT. The name of this tool is an abbreviation of “If This Then That”, which correctly explains how it functions. For example, if you save an article in Pocket, you can program the app to automatically save in Dropbox or Evernote as well.

Preserve Your Unique Voice


Although you have to keep track on the trends your target audience is interested in, no one would like to read the same information over and over again. Do not copy other bloggers and writers. You should make your content recognizable with your unique style and personality.


If you think you’ve already developed your voice, that doesn’t mean you should stop developing your writing skills. These tips will help you find, preserve, and develop your voice:


  • Explore the style of your favorite writers. That doesn’t mean you should copy it; only take it as an inspiration and example of how great content should look like.

  • Be studious about your own work. Are you presenting something new to your readers? Are you conveying a clear message that triggers a discussion? Is your article structured properly? Make sure to give affirmative answers to these questions.

Close-up of a young girl writing into her diary, in the park
Image Source: Writing In the Park via Shutterstock.


Have a Unique Point of View


Sure, you can write about something your readers are already familiar with, but you need to elaborate the topic from a specific point of view. If you follow someone else’s lead, your readers can easily find the content contradictory to another article you’ve published.


If you cannot find a creative angle, then it would be wise to leave that topic for later and find something more inspiring to write about.


Make the Content Believable


If you’re not writing a personal story, then you have to rely on verifiable facts! Your readers don’t like wasting time on content on broad, inaccurate claims. Don’t stretch the truth; make sure to find enough supportive facts and opinions from influential people. Do not try to manipulate your readers by creating unnecessary hype. This is the tool that will help you stay grounded:


  • Digg – This website is much more than a source of quick, fun reads; it’s also a well-curated feed of the stories and news that are gaining attention on the Internet. The daily email newsletter will help you get fresh information you can include in your articles.

Keep it Simple!


Make the sentences, words, and paragraphs short and readable. Complex style won’t get you with a large base of loyal readers. If you get carried away, make sure to cut the clutter during the editing stage. Yes, editing is necessary! The first draft is never a masterpiece!


Finished!


Now that you have a selection of effective ways that can turn you into a better content writer, you only need to stay committed to your practice!


The post Insider’s Tips for Better Content Writing appeared first on Speckyboy Web Design Magazine.


Insider’s Tips for Better Content Writing

Wednesday, February 25, 2015

10 WordPress Plugins For Better Backend Administration

One of the best parts about WordPress is how easy it is to customize with plugins. To illustrate its flexibility, here are a few examples of what you can do on your WordPress site with plugins:


Even though WordPress is designed to cater to as many scenarios as possible, you might want to change things like removing a menu from the Dashboard for particular users, or to simplify the backend for less technically savvy users such as your clients, or even to better and more easily manage widgets. Here are 10 handy plugins that will give you all that and more.


1. Adminimize


Adminimize is the plugin to install if you let your clients have access to the backend. It gives you more control over which part of the WordPress backend to hide or display for users. Some sections you can control with this plugin include the administration menu, the post and page editing screen, the Help menu at the top right of every administration page, the menu in the admin bar and many more.


2. Client Dash


Once activated, Client Dash simplifies the WordPress dashboard. It replaces the default Dashboard widget with menus that matter most to clients in general, which include the menu to their Account and the summary of website content like posts and pages.


3. Dashboard Widget Sidebar


There are actually two types of widget in WordPress. One, the website widget which is displayed in the front-end, and secondly, the widget inside the Dashboard. Adding the website widget is easily done through the Appearance > Widgets with drag-and-drop. Install this plugin, Dashboard Widget Sidebar, so you are also able to add new widget in the Dashboard just as easily through the Widgets menu.


4. Remove Dashboard Access


If you think that clients should not be allowed to access to the Dashboard, you can install Remove Dashboard Access. This plugin allows you to control and block Dashboard access for non-administrative users.


5. Wider Admin Menu


Sometimes, when you install a new plugin, it adds a new menu in the WordPress administration. The bad news is that the menu sometimes is longer than the WordPress admin menu width resulting in the name being split into two lines. Install Wider Admin Menu to widen the menu width in the backend.


6. Admin Color Schemer


WordPress 3.8 has brought a completely revamped look for the Dashboard. The Dashboard new look is designed through SCSS, and if you are familiar with SCSS you can certainly create a new one by yourself. For those of you who are not up to write SCSS code, install Admin Color Schemer and you can customize the Dashboard theme with a few clicks. For a more in-depth review, check out my earlier review.


7. Admin Bar Button


Admin Bar Button is a plugin that simplifies the WordPress admin bar that appears at the top when you are logged-in. Instead of spanning fully across the window, this plugin will turn the bar into a button (as shown below) and will be fully revealed upon click or hover. The plugin gives options through the Settings > Admin Bar Button menu to define button behaviours as well as its positions.


8. WP Help


WP Help is a plugin that will help you teach clients or anyone who are unfamiliar with WordPress how to get about in the backend. This plugin adds a new section below the Dashboard menu where you can create hierarchical sections of tutorials such as for creating post and pages or editing posts.


9. Dashboard Notes


Dashboard Notes, as the name implies, will add notes to the dashboard. The notes added will appear at the top of the Dashboard widget. You can add color to the note or add your logo to better grab one’s attention. This plugin will be particularly useful when you want to notify users with backend access of something important.


10. WP-Hotkeys


WP-Hotkeys is a plugin that adds keyboard shortcuts to WordPress administration so you can navigate throughout the backend area including the post editing screen simply by using the keyboard. If you are a keyboard master or prefer using the keyboard rather than any other interaction peripheral, then you will probably love this plugin.


10 WordPress Plugins For Better Backend Administration

10 WordPress Plugins For Better Backend Administration

One of the best parts about WordPress is how easy it is to customize with plugins. To illustrate its flexibility, here are a few examples of what you can do on your WordPress site with plugins:


Even though WordPress is designed to cater to as many scenarios as possible, you might want to change things like removing a menu from the Dashboard for particular users, or to simplify the backend for less technically savvy users such as your clients, or even to better and more easily manage widgets. Here are 10 handy plugins that will give you all that and more.


1. Adminimize


Adminimize is the plugin to install if you let your clients have access to the backend. It gives you more control over which part of the WordPress backend to hide or display for users. Some sections you can control with this plugin include the administration menu, the post and page editing screen, the Help menu at the top right of every administration page, the menu in the admin bar and many more.


2. Client Dash


Once activated, Client Dash simplifies the WordPress dashboard. It replaces the default Dashboard widget with menus that matter most to clients in general, which include the menu to their Account and the summary of website content like posts and pages.


3. Dashboard Widget Sidebar


There are actually two types of widget in WordPress. One, the website widget which is displayed in the front-end, and secondly, the widget inside the Dashboard. Adding the website widget is easily done through the Appearance > Widgets with drag-and-drop. Install this plugin, Dashboard Widget Sidebar, so you are also able to add new widget in the Dashboard just as easily through the Widgets menu.


4. Remove Dashboard Access


If you think that clients should not be allowed to access to the Dashboard, you can install Remove Dashboard Access. This plugin allows you to control and block Dashboard access for non-administrative users.


5. Wider Admin Menu


Sometimes, when you install a new plugin, it adds a new menu in the WordPress administration. The bad news is that the menu sometimes is longer than the WordPress admin menu width resulting in the name being split into two lines. Install Wider Admin Menu to widen the menu width in the backend.


6. Admin Color Schemer


WordPress 3.8 has brought a completely revamped look for the Dashboard. The Dashboard new look is designed through SCSS, and if you are familiar with SCSS you can certainly create a new one by yourself. For those of you who are not up to write SCSS code, install Admin Color Schemer and you can customize the Dashboard theme with a few clicks. For a more in-depth review, check out my earlier review.


7. Admin Bar Button


Admin Bar Button is a plugin that simplifies the WordPress admin bar that appears at the top when you are logged-in. Instead of spanning fully across the window, this plugin will turn the bar into a button (as shown below) and will be fully revealed upon click or hover. The plugin gives options through the Settings > Admin Bar Button menu to define button behaviours as well as its positions.


8. WP Help


WP Help is a plugin that will help you teach clients or anyone who are unfamiliar with WordPress how to get about in the backend. This plugin adds a new section below the Dashboard menu where you can create hierarchical sections of tutorials such as for creating post and pages or editing posts.


9. Dashboard Notes


Dashboard Notes, as the name implies, will add notes to the dashboard. The notes added will appear at the top of the Dashboard widget. You can add color to the note or add your logo to better grab one’s attention. This plugin will be particularly useful when you want to notify users with backend access of something important.


10. WP-Hotkeys


WP-Hotkeys is a plugin that adds keyboard shortcuts to WordPress administration so you can navigate throughout the backend area including the post editing screen simply by using the keyboard. If you are a keyboard master or prefer using the keyboard rather than any other interaction peripheral, then you will probably love this plugin.


10 WordPress Plugins For Better Backend Administration