Showing posts with label Using. Show all posts

Monday, June 1, 2015

Wireframe Animal Skulls Using Illustrator’s Blend Tool

I love Adobe Illustrator for its power to produce awesome artwork with just basic tools and techniques. In today’s tutorial we’re going to use nothing but Illustrator’s Blend tool to create a wireframe that’s so detailed you would think it was made in a complex 3D programs. By just drawing a few basic paths with your mouse, Illustrator can generate a series of intricate lines that resembles an animal skull. It takes a little trial and error to find the perfect layout, but once you do the results are epic!
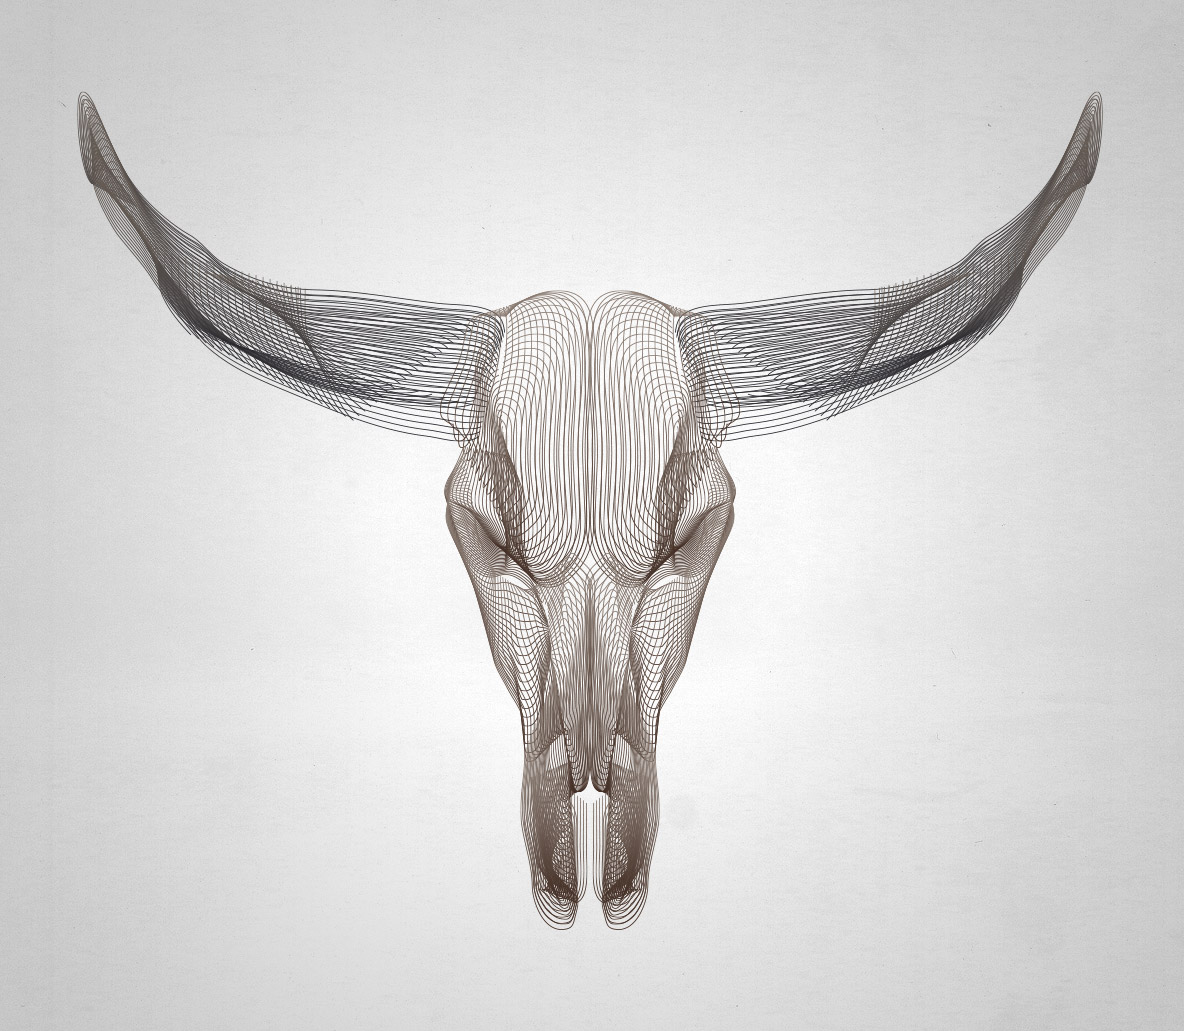


Wireframe animal skull using Illustrator


I’ll be creating this wireframe longhorn buffalo skull as part of this tutorial, but the technique works for any kind of animal head. Stags, rams and bulls are all great subjects to play with. Their horns can be tricky, but they produce the most striking results.


Find a reference photo of an animal skull and place it into an Illustrator document. I’m using this Long Horn Buffalo Skull image from Shutterstock. Reduce the Transparency of the image to around 50%, then press CMD+2 to lock it into place to avoid accidentally selecting it.


Double click the Pencil tool from the toolbar to edit its options. Move the Fidelity slider towards the Accurate end of the scale and deselect the Keep Selected option.


Clear out the default fill colour, leaving just a black stroke, then reduce the stroke weight to 0.25pt. Begin roughly tracing around the prominent areas of the skull, leaving open ended paths.


These paths don’t have to be accurate at all. It also requires a little trial and error to determine which placements generate the best results. I found that looping paths back to form “U” shapes provided good results. Focus on just one half of the skull. The wireframe can be duplicated for the other side.


In areas of detail, overlapping the strokes helps produce high density blends. It’s worth following the next few steps, then using the CMD+Z shortcut to come back to this point and edit paths to test different blend results.


Draw a selection around all the strokes that make up the skull, leaving the horns for now. Go to Object > Blend > Make.


Go back to Object > Blend > Blend Options and change the Spacing to Specified Steps. Turn on the preview and adjust the number to create a cool wireframe effect. If there’s any unusual blends, press CMD+Z and use the Pencil tool to edit selected paths to tweak the result.


When the skull is looking good, use the same technique on one of the horns. Trial and error is really the key to find the paths that accurately depict the subject. There will be a lot of undoing to tweak the paths to eliminate stray lines.


In my example, I added a couple more lines perpendicular to the main horn outlines. With these paths added to the blend the result was much more detailed with twists and turns.


Select the blended horn and move it into place over the main skull. Simply overlapping the two elements neatly merges them together.


Make a selection of both the skull and horn blends, then go to Object > Transform > Reflect. Press the Copy button to create a duplicate for the other half.


Move this second half into place on the other side. Overlapping the two halves slightly helps blend them together to eliminate any gaps.


Further cool effects can be created by adding a gradient directly to the stroke. Go for something bright and vibrant, or colour pick samples from the original photograph for a more subtle style.


Wireframe animal skull using Illustrator


The final result is a cool 3D style wireframe that looks like it was created with complicated NURBS. In reality all it took was some squiggly lines and Illustrator’s powerful blend tool!


Download the source file


The post Wireframe Animal Skulls Using Illustrator’s Blend Tool appeared first on Blog.SpoonGraphics.


Wireframe Animal Skulls Using Illustrator’s Blend Tool

Tuesday, May 19, 2015

How To Create SVG Animation Using CSS

Animating SVG can be done through native elements such as <animate> and <animateMotion>. But for those who are more familiar with CSS animation, not to worry, we can also use CSS Animation properties to animated SVGs as well.


CSS Animation could also be an alternative way of using JavaScript library like SnapSVG. In this post we will see what we can possibly deliver with CSS Animation in SVG.


1. Creating the Shapes


First of all, we will need to draw the shapes and objects which we want to animate. You can use applications like Sketch, Adobe Illustrator, or Inkscape to create one.


For this example, I have drawn a cloudy sky as the backdrop, and a rocket ship shooting upwards, flames included:


Once done with the drawing, we need to export each object we’ve created into SVG.


I’m going to use Sketch as an example for this step. Select the object you want to turn into SVG format. At the bottom right of your window, click Make Exportable. Choose SVG format, then click Export object-name. You need to do this one object at a time.


2. Insert the SVG into HTML


When you open the SVG file in a code editor, you’ll find that SVG codes are quite messy. Hence, before we deploy the SVG file, let’s tidy up the code and optimize it with this command line tool called SVGO.


Launch Terminal or Command Prompt, and install SVGO with this command line:


[sudo] npm install -g svgo

Tun the command, svgo, on the SVG file using --pretty to produce readable SVG code:


svgo rocket.svg --pretty

If you have multiple SVGs in a directory, you can optimize them all together, at once. Assuming the directory is named /images, then from the parent directory use this command:


svgo -f images --pretty

Let’s see the difference before and after using SVGO.


Copy the code within the SVG file and paste into an HTML file. We will work on a workspace of 800px by 600px wide, so let’s not forget to define the width on the SVG element.


<svg width="600" height="420" viewBox="0 0 600 600" xmlns="http://www.w3.org/2000/svg">
<g fill="none" fill-rule="evenodd">
<path d="M96.008 ..." fill="#FFF"/>
<path d="M55.53 ..." fill="#75C9EC"/>
<path d="M27.543 ..." fill="#0096D5"/>
</g>
</svg>

The SVG is set in the HTML file. We will need to define an ID for each object, so we can select them in CSS later.


For this tutorial, we need to define the ID for the rocket and the flames, and some of the clouds. In order for the objects to handle the animation stage later on, we need to add id – you can also use class – to each object. At this stage, the code will look like this:


<path id="cloud1" d="M-24.205 ..." opacity=".4" fill="#FFF" fill-rule="evenodd"/>
<path id="cloud2" d="M128.42 ..." opacity=".3" fill="#FFF" fill-rule="evenodd"/>
<path id="cloud3" d="M13.043 ..." opacity=".2" fill="#FFF" fill-rule="evenodd"/>
<path id="cloud4" d="M84.954 ..." opacity=".1" fill="#FFF" fill-rule="evenodd"/>

<g id="rocket" fill="none" fill-rule="evenodd">
<g id="flame" fill="none" fill-rule="evenodd">
<path d="M37.957.898s24.385 ..." fill="#FF5B0D"/>
<path d="M30.482 ..." fill="#FFD03D"/>
</g>
<path d="M96.008 ..." fill="#FFF"/>
<path d="M55.53 ..." fill="#75C9EC"/>
<path d="M27.543 ..." fill="#0096D5"/>
</g>

3. Animate Using CSS


Now let’s have some fun. The plan is to boost the rocket up into space. The rocket is split in two groups; the rocket itself and the flame.


First of all, we position the rocket in the middle of the workspace, as follows:


#rocket
transform: translate(260px,200px);

What you see is this:


Now to make the rocket look like it is going upwards, we need to create the illusion of clouds falling. The CSS that we use for this is:


#cloud1
animation: fall 1s linear infinite;

@keyframes fall
from
transform: translateY(-100px);

to
transform: translateY(1000px)


To make it look even more realistic, let’s animated four clouds, and make them "fall" at different speeds. We’ll also position them differently from the X-axis.


The second cloud will have code like this:


#cloud2
animation: fall-2 2s linear infinite;

@keyframes fall-2
from
transform: translate(200px,-100px);

to
transform: translate(200px,1000px)


Note that we have moved the cloud #2 a bit to the right, by 200px with translate. At this stage, the result should look like this.


Next, let’s make the rocket come to life. We will assign an animation keyframe, as follows:


#rocket
animation: popup 1s ease infinite;

@keyframes popup
0%
transform: translate(260px,200px);

50%
transform: translate(260px,240px);

100%
transform: translate(260px,200px);


And add animation to the rocket flame as well:


#flame
animation: shake .2s linear infinite;

@keyframes shake
0% transform: translate(55px, 135px) rotate(7deg);
20% transform: translate(55px, 135px) rotate(0deg);
40% transform: translate(55px, 135px) rotate(-7deg);
60% transform: translate(55px, 135px) rotate(0deg);
100% transform: translate(55px, 135px) rotate(0deg);


Right! Now that our codes are all set, the animation should be working on our SVG.


Take a look at our rocket blasting into space.


Final Thought


Animation is not the easiest feature in CSS to grasp. But hopefully you will find this tutorial as a good starting point to explore CSS Animation on SVG further; you’d be surprised to know what can be achieved with CSS Animation at hand.


If you want to start with the very basics, you can start here with this post: A Look Into: Scalable Vector Graphics (SVG) Animation or follow the rest of the SVG series.


How To Create SVG Animation Using CSS

How To Create SVG Animation Using CSS

Animating SVG can be done through native elements such as <animate> and <animateMotion>. But for those who are more familiar with CSS animation, not to worry, we can also use CSS Animation properties to animated SVGs as well.


CSS Animation could also be an alternative way of using JavaScript library like SnapSVG. In this post we will see what we can possibly deliver with CSS Animation in SVG.


1. Creating the Shapes


First of all, we will need to draw the shapes and objects which we want to animate. You can use applications like Sketch, Adobe Illustrator, or Inkscape to create one.


For this example, I have drawn a cloudy sky as the backdrop, and a rocket ship shooting upwards, flames included:


Once done with the drawing, we need to export each object we’ve created into SVG.


I’m going to use Sketch as an example for this step. Select the object you want to turn into SVG format. At the bottom right of your window, click Make Exportable. Choose SVG format, then click Export object-name. You need to do this one object at a time.


2. Insert the SVG into HTML


When you open the SVG file in a code editor, you’ll find that SVG codes are quite messy. Hence, before we deploy the SVG file, let’s tidy up the code and optimize it with this command line tool called SVGO.


Launch Terminal or Command Prompt, and install SVGO with this command line:


 [sudo] npm install -g svgo 

Tun the command, svgo, on the SVG file using --pretty to produce readable SVG code:


 svgo rocket.svg --pretty 

If you have multiple SVGs in a directory, you can optimize them all together, at once. Assuming the directory is named /images, then from the parent directory use this command:


 svgo -f images --pretty 

Let’s see the difference before and after using SVGO.


Copy the code within the SVG file and paste into an HTML file. We will work on a workspace of 800px by 600px wide, so let’s not forget to define the width on the SVG element.


 <svg width="600" height="420" viewBox="0 0 600 600" xmlns="http://www.w3.org/2000/svg"> <g fill="none" fill-rule="evenodd"> <path d="M96.008 ..." fill="#FFF"/> <path d="M55.53 ..." fill="#75C9EC"/> <path d="M27.543 ..." fill="#0096D5"/> </g> </svg> 

The SVG is set in the HTML file. We will need to define an ID for each object, so we can select them in CSS later.


For this tutorial, we need to define the ID for the rocket and the flames, and some of the clouds. In order for the objects to handle the animation stage later on, we need to add id – you can also use class – to each object. At this stage, the code will look like this:


 <path id="cloud1" d="M-24.205 ..." opacity=".4" fill="#FFF" fill-rule="evenodd"/> <path id="cloud2" d="M128.42 ..." opacity=".3" fill="#FFF" fill-rule="evenodd"/> <path id="cloud3" d="M13.043 ..." opacity=".2" fill="#FFF" fill-rule="evenodd"/> <path id="cloud4" d="M84.954 ..." opacity=".1" fill="#FFF" fill-rule="evenodd"/> <g id="rocket" fill="none" fill-rule="evenodd"> <g id="flame" fill="none" fill-rule="evenodd"> <path d="M37.957.898s24.385 ..." fill="#FF5B0D"/> <path d="M30.482 ..." fill="#FFD03D"/> </g> <path d="M96.008 ..." fill="#FFF"/> <path d="M55.53 ..." fill="#75C9EC"/> <path d="M27.543 ..." fill="#0096D5"/> </g> 

3. Animate Using CSS


Now let’s have some fun. The plan is to boost the rocket up into space. The rocket is split in two groups; the rocket itself and the flame.


First of all, we position the rocket in the middle of the workspace, as follows:


 #rocket transform: translate(260px,200px); 

What you see is this:


Now to make the rocket look like it is going upwards, we need to create the illusion of clouds falling. The CSS that we use for this is:


 #cloud1 animation: fall 1s linear infinite; @keyframes fall from transform: translateY(-100px); to transform: translateY(1000px) 

To make it look even more realistic, let’s animated four clouds, and make them "fall" at different speeds. We’ll also position them differently from the X-axis.


The second cloud will have code like this:


 #cloud2 animation: fall-2 2s linear infinite; @keyframes fall-2 from transform: translate(200px,-100px); to transform: translate(200px,1000px) 

Note that we have moved the cloud #2 a bit to the right, by 200px with translate. At this stage, the result should look like this.


Next, let’s make the rocket come to life. We will assign an animation keyframe, as follows:


 #rocket animation: popup 1s ease infinite; @keyframes popup 0% transform: translate(260px,200px); 50% transform: translate(260px,240px); 100% transform: translate(260px,200px); 

And add animation to the rocket flame as well:


 #flame animation: shake .2s linear infinite; @keyframes shake 0% transform: translate(55px, 135px) rotate(7deg); 20% transform: translate(55px, 135px) rotate(0deg); 40% transform: translate(55px, 135px) rotate(-7deg); 60% transform: translate(55px, 135px) rotate(0deg); 100% transform: translate(55px, 135px) rotate(0deg); 

Right! Now that our codes are all set, the animation should be working on our SVG.


Take a look at our rocket blasting into space.


Final Thought


Animation is not the easiest feature in CSS to grasp. But hopefully you will find this tutorial as a good starting point to explore CSS Animation on SVG further; you’d be surprised to know what can be achieved with CSS Animation at hand.


If you want to start with the very basics, you can start here with this post: A Look Into: Scalable Vector Graphics (SVG) Animation or follow the rest of the SVG series.


How To Create SVG Animation Using CSS

Saturday, May 2, 2015

10 Reasons Why You Should Search Using DuckDuckGo

These days, mostly, a search engine is the only source of information whenever someone is seeking the answer of a problem or a query. Usually, we carry out our search queries over the most popular search engine Google.com which is asked more than 3 billion search queries around the globe daily.


But, some other search engines are also available for the users with sound features. One of the prominent search engine is DuckDuckGo and it comes with some amazing features. In this post, we are going to look at 10 reasons why you should make DuckDuckGo your favorite search engine.


1. Protect The Privacy Of Your Searches


By using Google.com, each of our search query is tracked and because Google needs and uses this information to make our future search results more customized and relevant. Check out how you can use this to your advantage.


However, our search queries will reflect personal and intimate details about ourselves (health symptoms and how to seek medical help for certain conditions), things that we would prefer to keep private. In such cases, many of us want real privacy to carry out our searches, preferring to opt out of tracking. DDG respects our privacy and by default doesn’t track our searches. It’s even in their tagline.


You can see and customize the privacy settings by clicking on Options Button > Advanced Settings > Privacy. Here, you can select that whether you want to get tracked while searching sites or which version of http you would prefer to go with. You can also define video playback settings under the privacy section.


2. Save Your Settings In The Cloud


DDG allows you to save browser settings over the cloud by entering a passphrase. It uses Amazon S3 storage services to do this. All you need to do is save the settings using a passphrase. You can then load these settings on any other computer, using the same passphrase.


Enable Cloud Save by going into Advanced Settings. Here you will see the Cloud Save option on the right.


Click on Save Settings, enter a passphrase and click on the Save button.


To use these settings on a different computer, just go to Advanced Settings > Load Settings, and enter the exact passphrase you used. Click the Load button to enable the settings.


3. Narrow Down Your Search by Region


While searching on DDG, a user can change the region settings to customize the search results to cater to the audience of a particular region. To do this, go to Advanced Settings > General > Region. Then choose the region you want to narrow down your search results to.


4. Search Results Are In Categories


DDG allows categorized search for a particular term or word. For instance, if height is searched in DDG then it will show top search results related to the term and search results related to mathematics, people, and places as shown below.


5. Retrieving Information with Fewer Clicks


Whenever a search is made via DDG, it usually provides an immediate, short answer. You don’t have to click in to retrieve the information. This is a handy feature which can save your time especially when you just need a quick definition or a brief big picture understanding of your query.


6. All Search Results Are on A Single Page


While using other search engines, usually results for an asked query are displayed on multiple pages. Around 90% of people check only the search results displayed on the first page. One reason may be the assumption that search results on the second page onwards are not so important, which isn’t true.


Keeping this factor in consideration, DDG displays all search results on just a single page. Just scroll down and more results will be loaded and displayed.


7. Ad-Free Search Engine


By default, DDG displays the relevant ads to the search queries but you can make searches without being subjected to the ads. To disable ads in search results, click on Advanced Settings > General > Advertisements > Off.


8. Searching with a !Bang


One of the best things about DDG is its !bang feature. The best way to explain how it works is to show you. On the Duckduckgo search bar, type in "!amazon breaking bad" (without the quotes) and press Enter.


This entered search query will take you straight to the Amazon website, where you can see the search results for "breaking bad" merchandise returned by the on-site search engine.


Although this doesn’t work for all sites, the command does support "hundreds" of sites. Check out the full list here. If you want to add a particular site to be supported, send your request here.


9. Cool Keyboard Shortcuts


There are many useful keyboard shortcuts you can use on DDG. For instance, you can use the j key or down arrow and k or up arrow for moving down and up the search results.


The other shortcuts are:


  • h for going to the search box

  • s:d to show the results in terms of date (new/latest will be displayed at the top of the results)

  • m for going to the main search result

The list of all shortcuts can be found here. You can enable or disable keyboard shortcuts via the Settings page.


10. Changing the Appearance


One can customize the appearance of DDG as per their taste. You can find this in Settings > Theme. There are so far 6 different themes to choose from: Default, Basic, Contrast, Dark, Retro and Terminal. Here is what the Retro theme looks like. Changes are instant.


You can also change the font styles, sizes, page widths, background colours, typeface and color for results, etc. This is under Settings > Appearance. All changes are reflected instantly. However for them to stick, you need to click Save and Exit near the bottom.


10 Reasons Why You Should Search Using DuckDuckGo