In this tutorial, you’ll learn how to use Photoshop Displacement Maps to distort graphics so that they realistically match the background you’re applying them to. To make sure things are easy to follow along with, I’ll use animated GIFs for each step.
What’s a Displacement Map?
A Displacement Map is a way of automatically distorting a layer using pixel data from another document. Displacement Maps can take what would be slow, grueling hours of manual distortion work and turn it into a relatively quick and simple task.
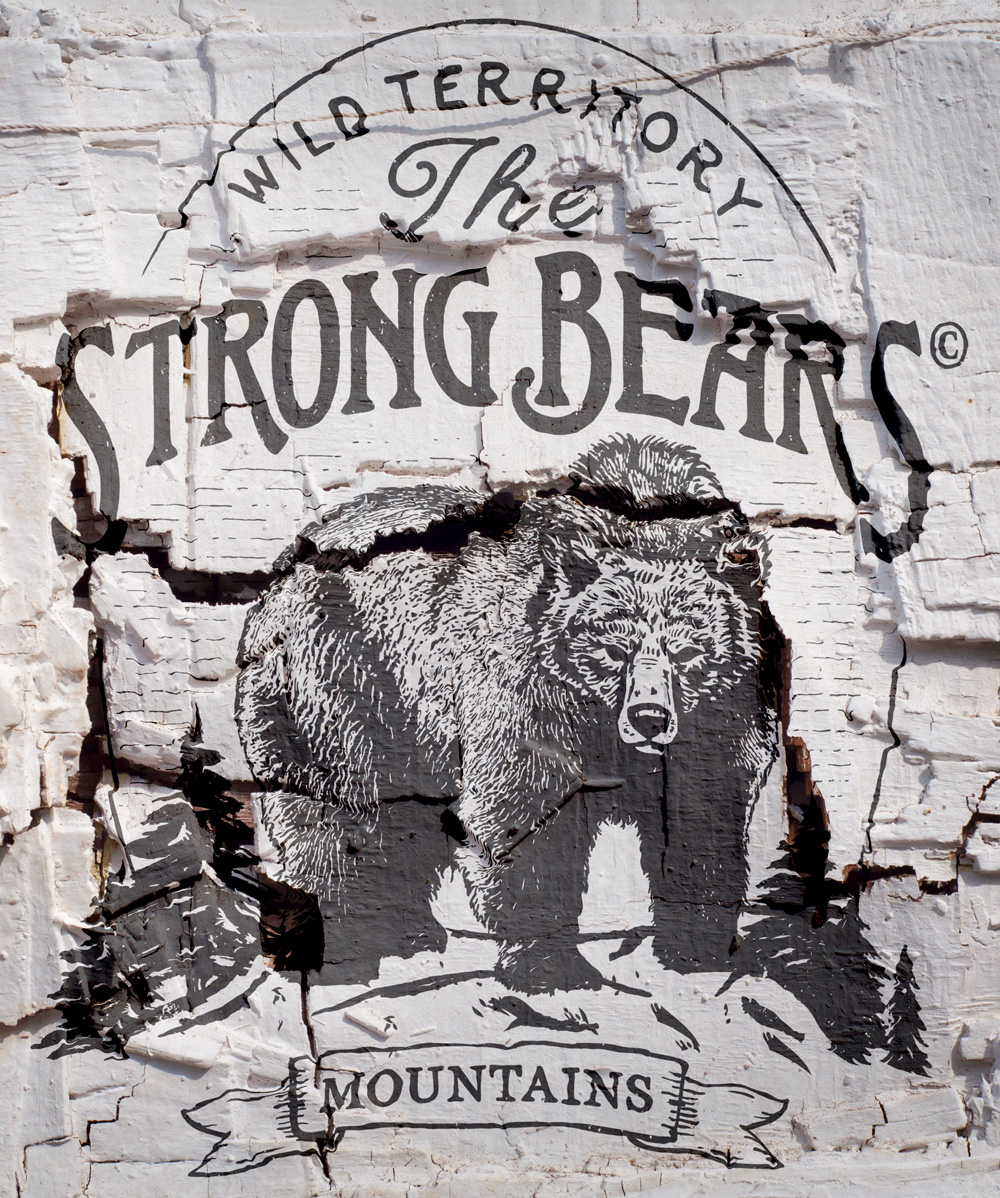
Here’s the result we’ll be creating:
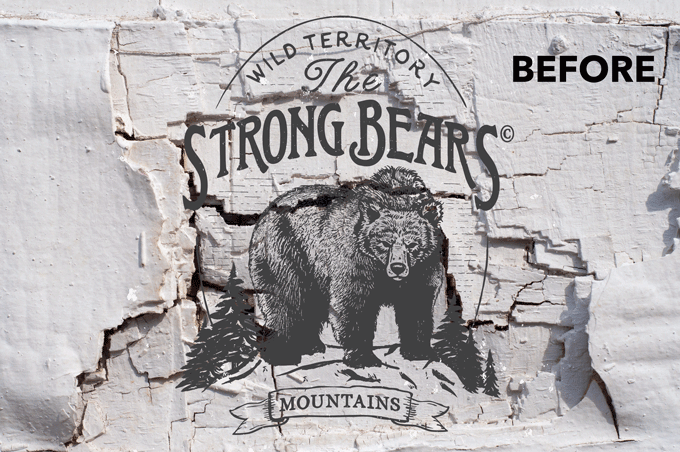
Where most designers would toss in the bear graphic, set it to Multiply, and call it a day, we’re going the extra mile by making sure the bear graphic is distorted to match the cracks and crevices of our wall texture. Pretty cool!
Resources
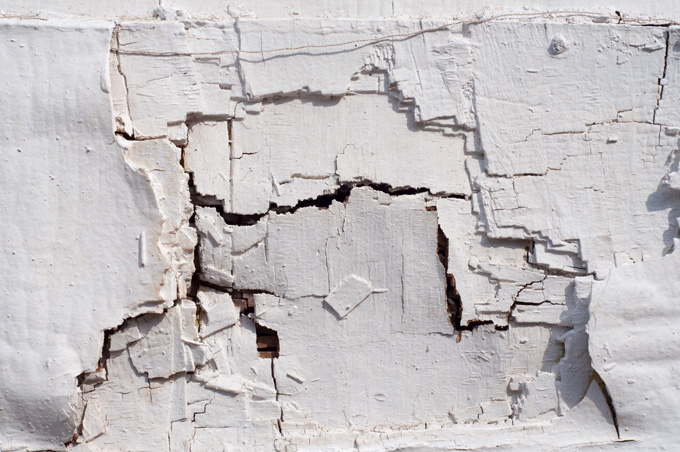
All you’ll need for this tutorial is an interesting, dynamic texture photo and a graphic to place over it. I’ll be using this nice, cracked wall photo and a cool, vintage bear logo.

If you’re using your own images, some of the settings below might need to be tweaked slightly, but the overall process should be the same. Let’s get started!
1. Open The Wall Image
Start by opening the wall photo in Photoshop.
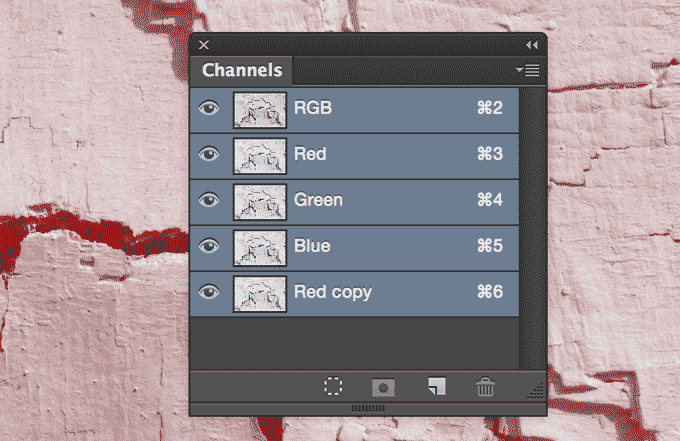
2. Copy The Red Channel
Next, go to your Channels panel and copy the Red channel. I simply chose the red one because it had nice contrast, your experience may vary.
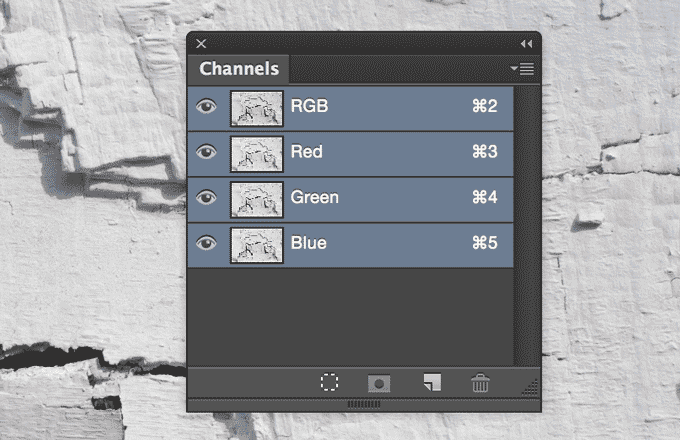
Note that this step is a bit redundant with step 4, I simply like to copy my channels before messing with them too much just to be on the safe side.
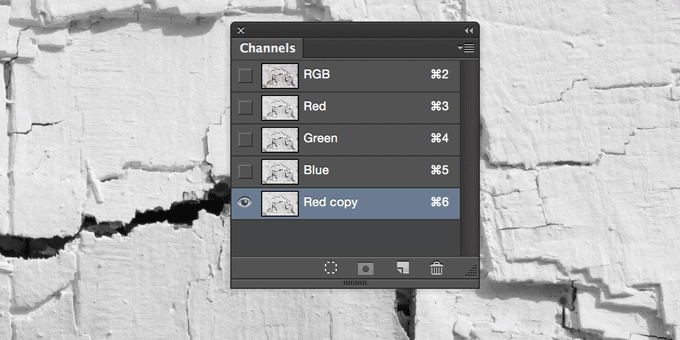
3. Turn Off All Channels Except the Red Copy
Now, make sure the only visible channel is your new copy. To do this, turn off the eye icons next to the others (typically, clicking a channel should also make it the only visible layer).
4. Create a New Document From The Red Channel
Right-click on your new channel and choose Duplicate Channel. You’ll want to choose New Document in the dropdown of the window that pops up, then click OK.
This will create a brand new file out of our red channel copy. This new file will serve as the input pixel data for our displacement map.
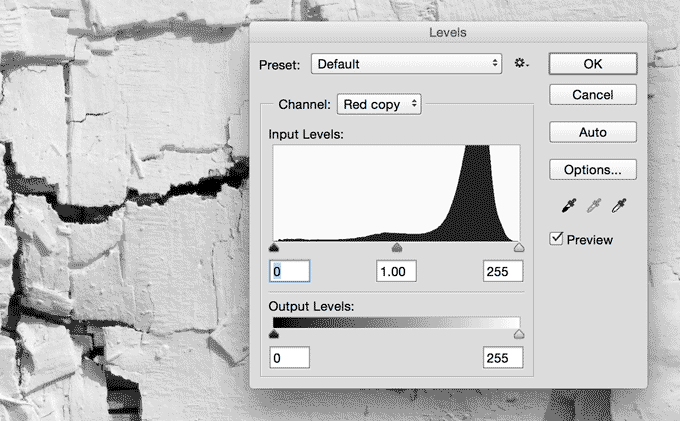
5. Increase Contrast in New Document
Displacement maps use highlights and shadows from grayscale documents to determine where the highs and lows will be in your distortion. Rather overthink how this works, we can simply use our background as our input and it will shape our distortion in a way that seems realistic.
Before we do this though, let’s ramp up the contrast in our new document a bit with a Levels adjustment.
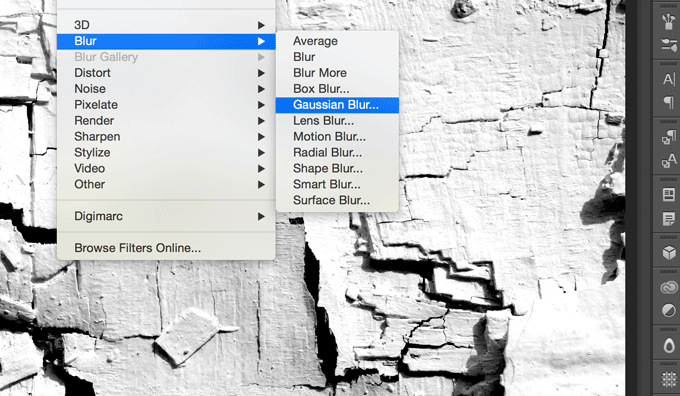
6. Blur New Document
Next, you’ll want to add a slight Gaussian Blur. This will help make sure the effect isn’t too harsh. How much you should blur greatly depends on the size and resolution of your document. For mine, a 4.4px blur worked great.
7. Save the Blurred File as a Separate PSD
Save this newly blurred PSD to your project folder as DisplacementMap.psd, then switch back to your original wall photo, making sure to turn off any extra channels you created earlier. You want just the wall photo in its original form:
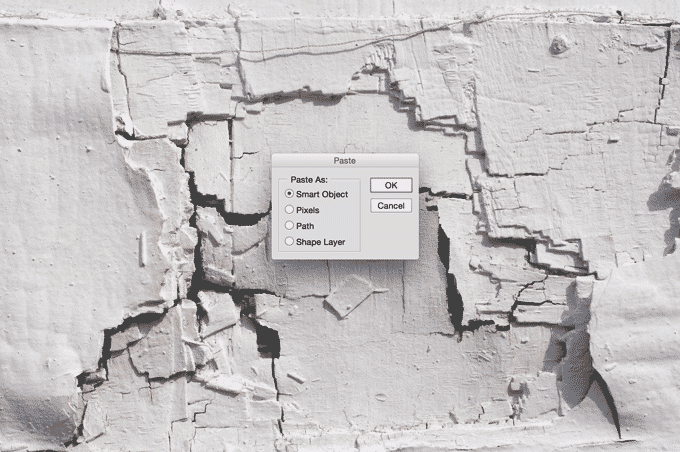
8. Paste In Graphic as Smart Object
In Illustrator, copy the graphic that you’re going to be applying to the textured wall. Then, paste it on top of the wall in Photoshop. Make sure to select Smart Object in the Paste dialog. Position the graphic however you like.
8. Set Graphic to Linear Burn, Fill 65%
To make sure the graphic is blending nicely, set it to Linear Burn. Then, drop the fill to 65%.
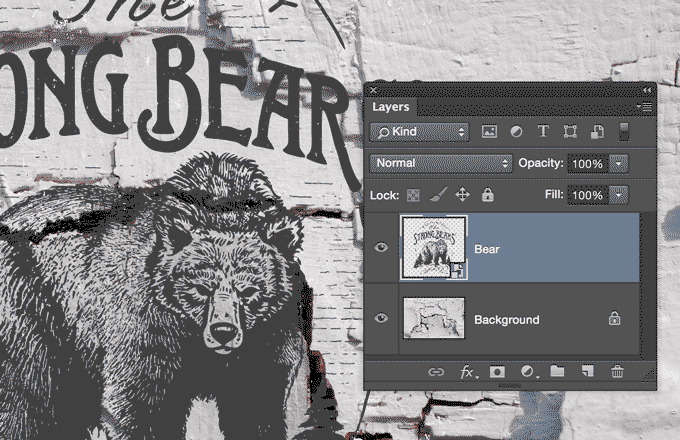
Note that, with my light background and dark graphic, I can use blending modes like Multiply, Color Burn, and Linear Burn. If your background is dark and your graphic is light, try Screen or Overlay.
9. Apply Displacement Map
Now we’re ready to distort the image. Go to Filter>Distort>Displace. In the dialog that pops up, the default options were just fine for me, but you may need to tweak them for your project.
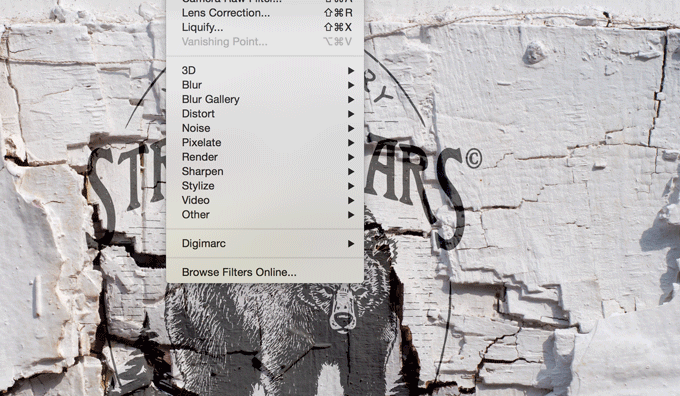
As you can see in the GIF above, the Displace dialog wants you to select a file. Simply select DisplacementMap.psd from before (the blurry one).
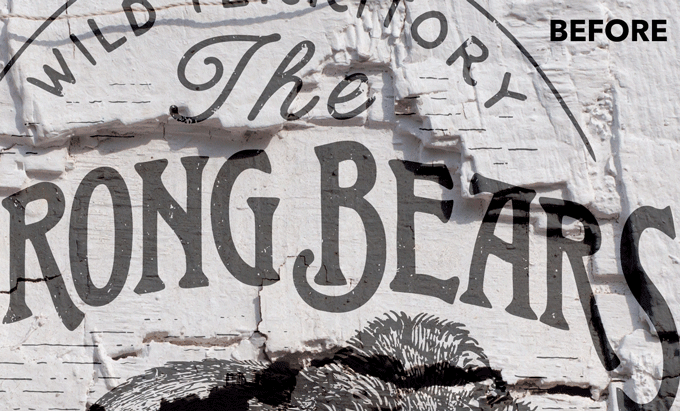
10. Admire The Results
That’s it! Your graphic should now be convincingly distorted to your background. Really zoom in and admire all the details. Imagine how long each little nudge would’ve taken you with the Liquify tool!
Tweak Where Necessary
Note that our results are impressive, but not perfect. For instance, some of the shadows in the image that shouldn’t distort the graphic, do. Depending on how detailed you want to get, you can spend a long time tweaking to make sure everything is perfect. For most uses though, I’m pretty happy with the effect that result from the simple steps above.

GIFtorial: How To Use Displacement Maps in Photoshop
No comments:
Post a Comment
Note: Only a member of this blog may post a comment.