There’s some talented artists out there who can hand paint stunning hyper-realistic art, but those kinds of skills are something us mere mortals can only dream of. Thankfully with the help of Photoshop it’s possible to create cool effects to mimic the style of painted images. In today’s tutorial I show you a few steps that will transform a photograph into a digitally painted piece of art with detailed brush strokes and blotchy colours.
The effect we’ll be creating in this tutorial transforms a photograph with fine brush strokes to produce a realistic painted appearance. This technique is great for simulating illustrated artwork for retro movie posters or just to give your images a cool stylized look.

Open up your chosen image in Photoshop. I’m using a portrait photo I picked out from Shutterstock. Add a Curves adjustment layer and darken the blacks and brighten the whites to subtly increase the contrast.

Use the shortcut CMD+J to duplicate the background layer twice, then with the uppermost layer selected add a High Pass effect from the Filters menu.

Adjust the High Pass filter radius slider until the details of the photo begin to emerge from the grey background. A low amount of around 1-3px is all that’s required to avoid any haloing.

Change the blending mode of this High Pass layer to Linear Light to drastically sharpen the photograph. These sharp areas will help create detailed brush strokes, especially on the hairs.

Merge the High Pass layer with the background duplicate below it to make this effect permanent, then head to Filter > Stylize > Diffuse.

Change the Diffuse mode to Anisotropic. This is the key ingredient to give the image that cool brushed appearance.

If you look closely at your artwork, you may notice some ugly seaming where the diffusing repeats. I’ve come up with a little technique to fix this…

Go to Image > Image Rotation > 90° CW, then use the shortcut CMD+F to repeat the addition of a Diffuse filter.

Rotate the image by 90° again, then apply another Diffuse filter. Repeat this step for a third time then rotate the image for a final time to place it the right way up.

The Diffuse filter adds a cool brushed effect but it has blurred the image slightly. Go to Filter > Sharpen > Smart Sharpen to bring out some of the details. Use an amount of around 100% but a low Radius to avoid over processing the image.

This result looks pretty good as it is. The texturing from the Diffuse filter adds lots of swirly details on the skin which gives the image a traditionally painted effect. However, there’s one little step that further manipulates the image and results in more of a digitally painted look. Select Surface Blur from the Filter > Blur menu and adjust the values to around 50px Radius and 15 Threshold. Fine tune these values so only the large flat areas are affected.

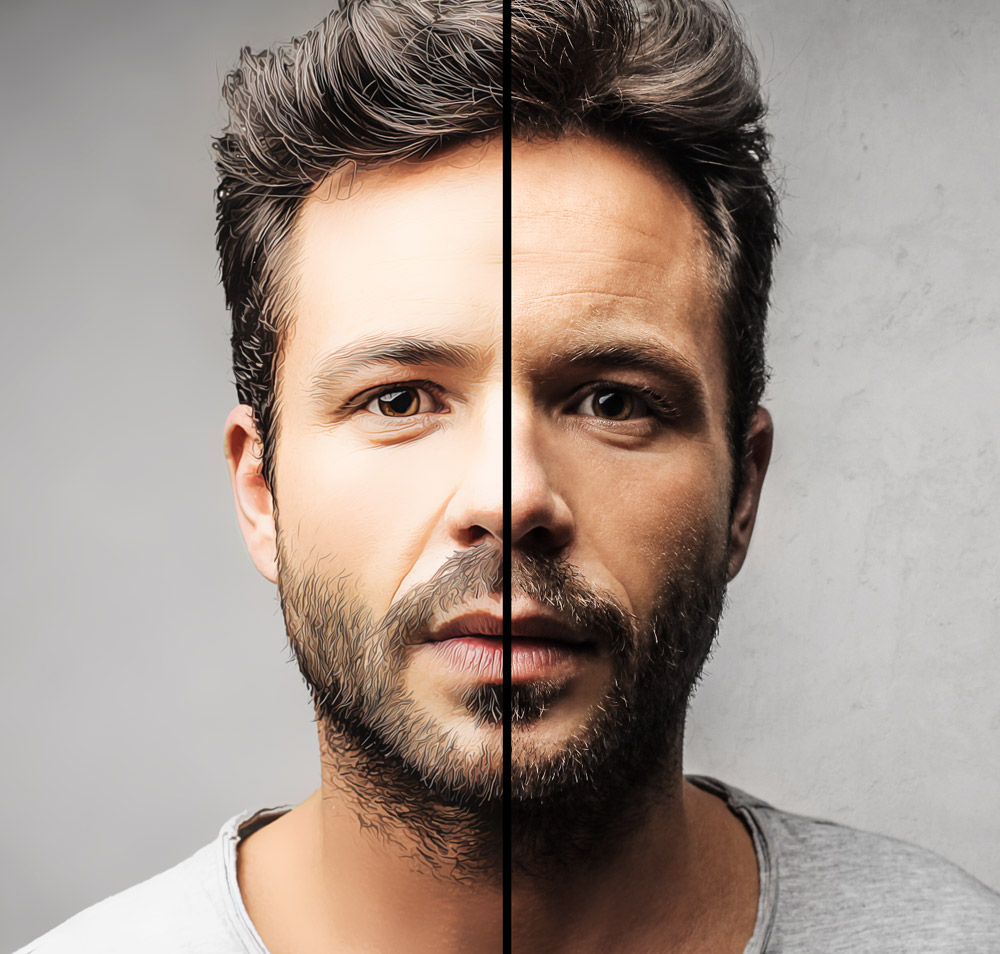
The result is cool effect that mimics digital paintings. The smudged blending of colours and the appearance of fine brush strokes really help achieve a realistic painted look.

The effect really comes the life the closer you get. From afar the fine details can blend to look like a normal photograph, but up close you see what looks like hundreds of individual brush strokes.
The post How To Create a Realistic Painted Effect in Photoshop appeared first on Blog.SpoonGraphics.


How To Create a Realistic Painted Effect in Photoshop
No comments:
Post a Comment
Note: Only a member of this blog may post a comment.